How to Waterproof a Bathroom: Step-by-Step Guide

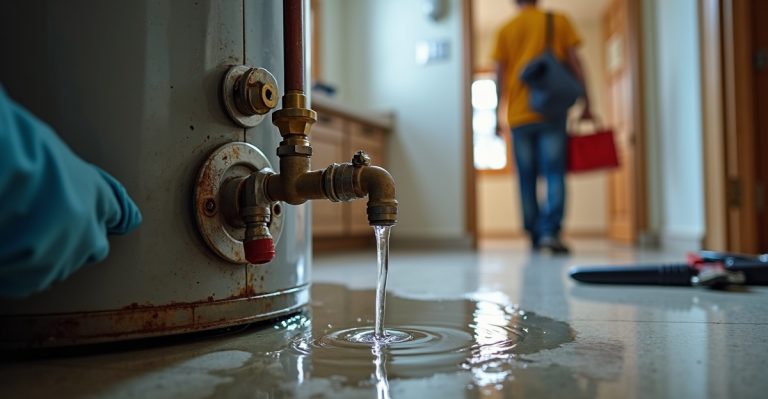
Water damage is one of the most common—and costly—issues homeowners face during or after a bathroom renovation. Knowing how to waterproof a bathroom properly is essential to protect your property, comply with Australian standards, and avoid long-term repair headaches.
Whether you’re upgrading your shower, fixing leaks, or planning a full renovation, this guide will walk you through everything you need to know.
Here’s what we’ll cover in this comprehensive guide:
- Why Waterproofing Your Bathroom Matters
- What Is Bathroom Waterproofing?
- Step-by-Step: How to Waterproof a Bathroom
- DIY Waterproofing vs. Hiring a Licensed Professional
- Choosing the Right Waterproofing Materials
- Cost to Waterproof a Bathroom in Australia
- Signs Your Bathroom Needs Re-Waterproofing
- Final Tips for Ensuring Long-Term Waterproofing Success
First, let’s understand why bathroom waterproofing is so important—and what can go wrong if it’s not done right.
Why Waterproofing Your Bathroom Matters
Waterproofing your bathroom isn’t just a box to tick during a renovation—it’s a critical step that protects your home’s structure, prevents costly repairs, and ensures compliance with Australian building codes. Bathrooms are among the wettest areas in any property, and without proper waterproofing, even small leaks can lead to significant water damage over time.
Whether you’re renovating or simply maintaining your space, understanding why and how to waterproof a bathroom is key to preserving both the appearance and safety of your home.

Common Causes of Water Damage in Bathrooms
Bathrooms are exposed to water on a daily basis—from showers, baths, sinks, and even condensation. Over time, this constant moisture can seep into the walls, floors, and substructure, especially if your waterproofing system is outdated or poorly installed.
Common causes of water damage include:
- Leaking showers or tubs due to deteriorated grout or silicone
- Improper or missing waterproof membranes beneath tiles
- Faulty sealing around joints, drains, and plumbing fixtures
- Poor drainage design, allowing water to pool in corners or behind walls
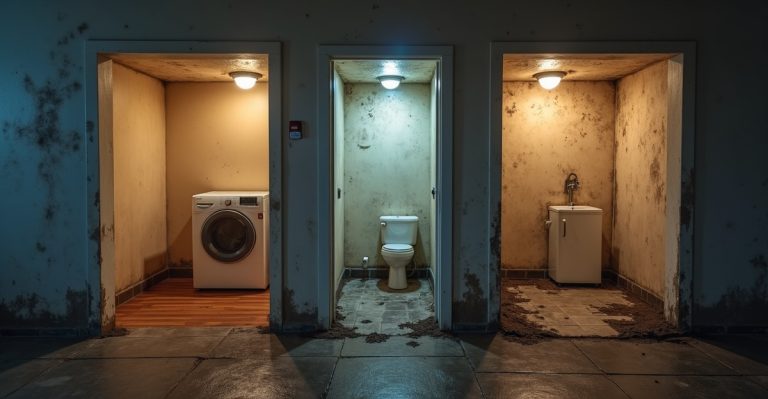
Even a small, unnoticed leak can result in mould growth, rotten timbers, and compromised flooring—problems that are often hidden until significant structural damage has occurred.

Consequences of Faulty Waterproofing
When waterproofing fails, the consequences can be both expensive and hazardous. You may notice peeling paint, swollen skirting boards, or a persistent musty smell—all signs of moisture damage beneath the surface. These are often early signs your waterproofing is failing and should be addressed promptly before they escalate into major structural repairs.
The risks of inadequate waterproofing include:
- Mould and mildew, which can affect indoor air quality and trigger health issues
- Structural damage to timber, plasterboard, and subflooring
- Building defects that can reduce property value or cause insurance complications
- Costly repairs, often involving removal of tiles, re-waterproofing, and extensive remediation work
In short, skipping or skimping on proper bathroom waterproofing may save money upfront—but it can cost you far more down the line.

Legal and Safety Implications
In Australia, bathroom waterproofing is not just best practice—it’s a legal requirement, and understanding does home insurance cover plumbing problems can help you avoid costly surprises. According to the Building Code of Australia and AS 3740 standards, all wet areas in residential buildings must be waterproofed by a certified professional.
In New South Wales, only individuals with a waterproofing license are permitted to carry out waterproofing work for residential buildings. Failing to comply can result in penalties, failed inspections, and voided warranties or insurance claims.
Engaging a licensed contractor ensures that waterproofing is completed to code, protecting your home and giving you peace of mind that the job has been done correctly. You can read more about compliance requirements at Waterproofing of Wet Areas – HIA
Key Takeaway: Proper bathroom waterproofing prevents hidden leaks, health hazards, and costly structural damage. In Sydney and across NSW, it’s also a legal must—so whether you’re building new or renovating, make sure waterproofing is handled professionally and to Australian standards.
What Is Bathroom Waterproofing?
Bathroom waterproofing is the process of creating a sealed, water-resistant barrier in wet areas to prevent moisture from penetrating into walls, floors, and the underlying structure of a home. While it’s often hidden behind tiles or under flooring, this waterproof barrier plays a critical role in protecting your bathroom—and your property—from water damage and long-term structural issues.
Simply put, waterproofing is a process that stops water from seeping into places it shouldn’t. In bathrooms, where daily exposure to moisture is unavoidable, a properly installed waterproofing system ensures that splashes, spills, and steam don’t lead to mould growth, rot, or hidden damage.
Let’s explore where waterproofing is required, what systems are commonly used in Australia, and the national standards that guide best practices.

Wet Areas and Where Waterproofing Is Needed
Not every part of your bathroom needs waterproofing, but the high-moisture zones absolutely do. These areas are legally classified as “wet areas” under Australian building codes and must be properly treated.
Key areas that require waterproofing include:
- Shower floor and walls (up to at least 1800mm high)
- Bathroom floors, particularly if the bathroom is on an upper level
- Junctions where walls meet floors or different materials intersect
- Wet room bathrooms with open-plan designs and no shower screens
- Bath surrounds and behind vanities with nearby plumbing fixtures
Even the smallest design oversight—like failing to seal under a freestanding tub—can lead to moisture buildup and damage over time. If your space includes features like bathroom vanity installation or bath surrounds, ensuring these zones are properly sealed is critical.

Types of Waterproofing Systems Used in Australia
In Australia, there are two main types of waterproofing systems commonly used in bathrooms:
- Liquid Membrane Systems
These are brush- or roller-applied membranes that cure to form a seamless, flexible coating. Ideal for complex layouts and corners, liquid membranes bond tightly to surfaces and allow for slight movement in building materials. - Sheet Membrane Systems
These pre-formed sheets (often made from bitumen or synthetic rubber) are laid out and sealed at joins. They offer uniform thickness and strong water resistance but require skilled installation to prevent gaps or folds.
These methods are especially relevant in full bathroom renovations, where layout complexity and wet area design influence which waterproofing system is chosen. For help comparing options, see our guide to choosing waterproofing membranes.
Both systems have their pros and cons, and the choice often depends on the bathroom’s layout, substrate material, and the installer’s expertise — see our deeper dive into choosing between liquid and sheet membranes. What’s critical is that the membrane—whether liquid or sheet—is applied correctly and thoroughly.

Australian Standards for Waterproofing (AS 3740)
All bathroom waterproofing in Australia must meet the requirements of AS 3740 – Waterproofing of Domestic Wet Areas. To better understand how these waterproofing requirements are regulated across New South Wales specifically, see our comprehensive guide to NSW waterproofing regulations homeowners must know.
This standard outlines the minimum performance criteria, materials, and application techniques needed to achieve compliance.
Key points include:
- Only licensed or certified professionals should carry out the waterproofing work
- Membranes must be compatible with the surfaces they’re applied to
- Coverage must extend a set height and distance from all wet zones
- The system must remain durable and watertight over time—even under regular movement and moisture exposure
Complying with AS 3740 isn’t optional—it’s a legal requirement under the National Construction Code (formerly part of the Building Code of Australia). Ensuring your waterproofing meets these standards is essential to protect your home, meet inspection requirements, and maintain resale value.
Key Takeaway: Bathroom waterproofing is a vital, regulated process that protects your space from moisture damage. Whether you’re working on a wet room bathroom or a compact ensuite, using the right waterproofing system—installed to AS 3740 standards—is the foundation for a safe, lasting renovation.
Step-by-Step: How to Waterproof a Bathroom
If you’re planning a renovation or building a new bathroom, understanding the steps involved in professional waterproofing can help you make informed decisions and ensure the job is done right.
While the exact method may vary slightly based on bathroom type and materials used, the process typically follows a strict sequence to meet Australian standards. Understanding the steps involved helps you plan properly or assess if your licensed professional is following best practices.
Here’s a clear, step-by-step look at how licensed professionals waterproof a bathroom, from preparation to final tiling.

Surface Preparation (Cleaning, Moisture Testing)
Every successful waterproofing job begins with thorough preparation. The goal is to create a clean, dry, and stable surface that allows the membrane to adhere properly.
- Clean all surfaces to remove dust, grease, or old adhesive
- Repair cracks or imperfections to create a smooth substrate
- Conduct moisture testing to ensure no underlying dampness is present
- Ensure the area is completely dry before any product is applied
Skipping this step can compromise the waterproofing system before it even begins. It’s also a good time to assess if any bathroom wall repairs or flooring updates are needed before waterproofing begins.

Priming and Applying the Membrane
Once the surface is prepped, a primer is applied to improve adhesion between the substrate and the waterproofing layer. Then, the waterproof membrane application begins.
- Primer is applied evenly and allowed to dry
- The first coat of waterproof membrane is applied using a roller or brush
- After drying, professionals will apply a second coat perpendicular to the first to ensure full coverage
This two-coat method helps eliminate weak points and provides a robust, flexible waterproof barrier across all treated surfaces.

Sealing Joints and Corners (Grout and Silicone Sealing, Tile Adhesive)
Corners, wall-to-floor junctions, and around plumbing penetrations are the most common points of failure if not sealed correctly.
- Flexible sealant (such as silicone) is used in joints and corners before membrane application
- Bond breakers may be added at movement-prone areas to prevent cracking
- Once the membrane is applied and cured, grout and tile adhesive can be used during tiling to maintain the seal
These fine details are critical for creating a continuous, reliable barrier—especially around fixtures like the shower base or floor waste.

Drying and Curing Time (24 Hours to Dry, Waterproofing Is Completed)
Drying time is not something to rush. For most products, the first coat must be fully dry before applying the second, and the entire system needs time to cure before any tiling begins.
- Allow each coat at least 24 hours to dry (depending on product and weather)
- Use fans or ensure proper ventilation to support curing
- Avoid stepping on or covering the area prematurely
Only once the waterproofing is completed and cured should any further work proceed. Premature tiling or traffic can damage the membrane and compromise the entire job.

Inspection and Final Tiling (Adding Tiles, Ensure Your Bathroom)
Before tiling begins, a qualified professional may conduct a visual inspection to ensure the membrane is intact, even, and free of defects. In some cases, especially for larger renovations, a formal inspection may be required to meet compliance.
- Check for missed areas or pinholes in the membrane
- Ensure membrane is applied to the required heights (e.g., shower walls up to 1800mm)
- Proceed with adding tiles using the correct adhesive
- Take care not to damage the membrane during tiling
At this stage, the waterproofing system serves as the foundation for the visible layers of your bathroom. Done correctly, it provides decades of protection, giving you peace of mind and confidence in the longevity of your renovation.
Key Takeaway: Proper waterproofing follows a precise, multi-step process—from surface prep to applying a second coat of membrane and final inspection. Cutting corners or skipping drying time risks long-term issues. That’s why working with licensed professionals who understand each phase of the process is the best way to ensure your bathroom is both beautiful and built to last.
DIY Waterproofing vs. Hiring a Licensed Professional
If you’re tackling a bathroom renovation, you may be wondering whether you can take on waterproofing as a DIY job. While some aspects of the renovation can be handled by experienced homeowners, waterproofing is one area where expertise, compliance, and long-term peace of mind matter most.
Let’s break down what you can safely do yourself, the risks of getting it wrong, and why it’s often best to have the work carried out by a licensed professional. For a more in-depth comparison, check out our guide on DIY waterproofing vs hiring a professional in NSW to better understand the pros, cons, and compliance risks.

What You Can Do Yourself (and What You Shouldn’t)
DIY bathroom projects can be satisfying and cost-effective—painting, installing fixtures, or even tiling are all tasks that many confident renovators take on. But when it comes to waterproofing, there are strict legal and technical boundaries in place for good reason.
You can safely do:
- Remove old fittings, tiles, or sealant
- Clean and prepare surfaces before waterproofing
- Choose materials and plan the layout
You should not do:
- Apply waterproofing membrane (unless you are licensed in NSW)
- Attempt to waterproof a shower, floor, or wall in a wet area
- Bypass or “patch fix” damaged waterproofing layers
In New South Wales, any waterproofing in wet areas must be carried out by a licensed waterproofing specialist. This ensures that the job meets Australian standards and avoids costly non-compliance.

Risks of Poor Waterproofing and Building Defects
DIY waterproofing might look simple on the surface—but even minor application errors can have serious consequences down the track.
Common risks of unlicensed or poor waterproofing include:
- Water leaks that go unnoticed until significant structural damage occurs
- Mould and mildew growth, which can affect your health and air quality
- Failure to meet the Building Code of Australia, which may void your insurance
- Expensive rectification work if a bathroom must be ripped up and redone
In fact, faulty waterproofing is one of the most frequent causes of building defects reported in residential properties across Australia. And unlike a crooked tile or uneven grout, waterproofing issues are often hidden—until it’s too late.

Why Hire a Licensed Waterproofing Contractor in NSW?
Hiring a licensed waterproofing contractor means the work is done to code, with the right products, and with accountability built into the process. In NSW, licensing ensures that professionals have completed accredited training and understand the technical requirements of AS 3740 – Waterproofing of Domestic Wet Areas.
Benefits of working with a licensed specialist:
- Compliance with national and state regulations
- Use of high-quality, approved waterproofing systems
- Professional diagnosis of potential water ingress issues
- Warranty and documentation of work
- Peace of mind that the job is done right the first time
At In House Plumbing, we bring over 20 years of experience in the industry, ensuring every waterproofing job we handle is durable, compliant, and stress-free for the homeowner.
DIY vs. Professional Waterproofing: Quick Comparison
| Task | DIY Job | Licensed Professional |
| Surface prep (cleaning, removal) | ✅ Yes | ✅ Yes |
| Applying waterproof membrane | ❌ Not allowed in NSW | ✅ Required by law |
| Meets Australian Standards | ❌ Risky | ✅ Guaranteed |
| Warranty coverage | ❌ Usually none | ✅ Often included |
| Risk of hidden defects | 🔺 High | ✅ Minimised |
| Long-term reliability | ❓ Uncertain | ✅ Proven and tested |
Key Takeaway: While there’s satisfaction in DIY renovations, bathroom waterproofing isn’t the place to cut corners. In NSW, only licensed professionals are legally allowed to perform this work—and for good reason. With so much at stake, hiring an experienced contractor ensures your bathroom is built to last, compliant with standards, and protected from future damage.
Choosing the Right Waterproofing Materials
Selecting the right waterproofing materials is a crucial part of ensuring your bathroom remains protected, functional, and compliant with Australian standards. This decision is just as important as choosing fixtures like your bathroom sink or countertop installation, as the waterproofing beneath supports the longevity of all surface elements.
Here’s how to evaluate the materials that make up your bathroom’s waterproofing system and what to look for when making decisions with your contractor or supplier.

What Makes a Good Waterproofing Membrane?
A waterproofing membrane is the core product in any bathroom sealing system. It forms the invisible layer between your structure and your tiles, preventing moisture from penetrating into walls and floors.
Qualities to look for in a high-quality membrane:
- Flexibility – so it can handle minor movement in walls or flooring
- Adhesion – it should bond well to a range of surfaces including concrete, render, and cement sheeting
- Water resistance – it must be completely impervious to water
- Compatibility – it must work with your selected tile adhesive, grout, and any finishes
- Certified to AS 4858 – membranes should meet Australian standards for wet area applications
There are two main types:
- Liquid membranes – easy to apply, especially in tight corners or over complex shapes
- Sheet membranes – pre-formed rolls that offer consistent thickness and faster curing
A licensed professional will help choose the best membrane for your bathroom based on layout, substrate, and exposure to water. You can also review this in-depth comparison of waterproofing membranes to understand which type suits your needs.
Eco-Friendly and Smart-Home Options
Modern homeowners are increasingly looking for water-resistant materials that are not only effective but environmentally conscious.
Eco-friendly waterproofing options may include:
- Low‑VOC waterproofing membranes (volatile organic compound) liquid membranes that are safer for indoor air quality
- Water-based primers and sealants with reduced chemical emissions
- Sustainable underlays or recycled content in tiling substrates
If you’re incorporating smart home technology, such as in-floor heating or automated ventilation systems, your waterproofing materials must be compatible. Not all membranes handle heat or electrical conduits equally—so it’s essential to disclose these features to your contractor during planning.

Material Longevity and Durability Considerations
Waterproofing isn’t something you want to redo in five years. The materials used must deliver long-term protection and withstand decades of exposure to humidity, water, and cleaning products.
Durability tips:
- Opt for a waterproofing agent or membrane from a reputable manufacturer
- Confirm the product has been tested for wet area use in Australia
- Look for warranties and performance data that support long service life
- Use compatible systems—mixing products from different brands can cause adhesion or failure issues
Choosing the cheapest product may save money upfront but can lead to costly repairs if the membrane deteriorates early or fails to bond. For guidance on selecting long-lasting options, explore this guide to bathroom waterproofing products that stand the test of time.
Key Takeaway: Choosing the right waterproofing materials—from membranes to sealants—plays a vital role in the longevity and success of your bathroom. Prioritize certified products, eco-friendly options where possible, and always ensure compatibility with your entire bathroom system. A licensed contractor can guide you toward solutions that are both high-performance and compliant with NSW building regulations.
Cost to Waterproof a Bathroom in Australia
Understanding the cost to waterproof a bathroom is essential when planning a renovation or repair. While the upfront price can vary, investing in professional waterproofing protects your home from future issues and ensures your bathroom complies with Australian standards.
In Sydney, bathroom waterproofing costs typically range from $500 to $1,500+, influenced in part by plumber hourly rates in Sydney and the complexity of the job.
Let’s take a closer look at what influences pricing and why cutting corners can lead to much higher costs down the line.

Factors Affecting Cost (Size, Condition, Complexity)
Several key factors influence how much you’ll pay to waterproof your bathroom:
- Size of your bathroom: Larger spaces require more membrane, labour, and time
- Condition of the substrate: Damaged or uneven surfaces need repair before waterproofing can begin
- Complexity of layout: Walk-in showers, niches, or irregular angles increase application time and difficulty
- Location of bathroom: Upper-floor bathrooms may require additional sealing around junctions and drainage
- Accessibility and prep work: If old waterproofing needs removal, expect extra charges
Here’s a general pricing guide for Sydney homeowners:
| Bathroom Type | Estimated Cost Range |
| Small ensuite (2–4m²) | $500 – $800 |
| Standard bathroom (4–6m²) | $800 – $1,200 |
| Large bathroom or wet room (6m²+) | $1,200 – $1,800+ |
Note: Prices include labour and standard waterproofing materials, but not tiling or surface prep for unusually damaged areas.
What’s Included in a Professional Waterproofing Job?
When you hire a licensed specialist, you’re paying for more than just the application of a membrane. A full professional waterproofing job includes:
- Surface preparation (cleaning, moisture testing, repairs)
- Application of primer and waterproofing membrane (usually two coats)
- Sealing of joints and corners with grout or silicone as needed
- Adherence to AS 3740 standards and building code requirements
- Drying and curing time, with quality checks before tiling
- A certificate of compliance or warranty documentation (in most cases)
While DIY options may seem cheaper, they rarely include these crucial steps—especially legal compliance.
Value vs. Risk: Cost of Repairs from Faulty Waterproofing
Trying to save money by skipping professional help or using substandard materials can backfire. If waterproofing fails, the cost to fix it far exceeds the initial investment.
Here’s what faulty waterproofing might cost you:
- Mould removal and structural repair: $5,000 – $20,000
- Bathroom demolition and retiling: $8,000 – $15,000
- Insurance excess or claim denials due to non-compliance
These risks highlight why licensed waterproofing isn’t just about performance—it’s about protecting your home, your investment, and your peace of mind.
Key Takeaway: The cost to waterproof a bathroom in Australia varies by size, condition, and complexity—but professional work is well worth the price. When done properly, it adds long-term value and protects you from costly water damage repairs. Always ask for a licensed contractor who follows Australian standards and provides clear pricing upfront.
Signs Your Bathroom Needs Re-Waterproofing
Even the best waterproofing systems don’t last forever. Over time, age, wear and tear, or poor installation can lead to waterproofing issues that put your bathroom—and your home—at risk. Knowing the signs of water damage and when to act can save you thousands in repairs and prevent more serious structural problems.
Here’s how to assess whether your bathroom might need re-waterproofing, and what to do next if you spot the warning signs.

Visual Clues and Red Flags
The most common red flags of poor waterproofing aren’t always obvious at first. Keep an eye out for these visual indicators:
- Peeling paint or bubbling walls – often caused by trapped moisture behind surfaces
- Discoloured grout or tiles – may signal water seepage beneath the surface
- Mould or mildew growth – especially in corners, ceilings, or near skirting boards
- Cracked or crumbling grout – can allow water to penetrate and weaken underlying structures
- A musty smell or visual signs of moisture may indicate hidden issues.
- Leaking shower bases or puddles after use – a clear sign the waterproof membrane has failed
If you notice any of these signs, it’s time to investigate further—especially if your bathroom is more than 10 years old or hasn’t been inspected recently.

When to Call a Professional
While some cosmetic issues can be resolved with a deep clean or re-grouting, signs of ongoing or hidden water damage should always be assessed by a professional. Leaking showers, for example, can quickly lead to structural damage beneath tiles, affecting flooring, joists, and even adjacent rooms.
Call a licensed waterproofing specialist if you notice:
- Persistent damp spots on floors or walls
- Water stains or paint bubbling on ceilings below an upper-level bathroom
- A history of bathroom leaks or repairs that didn’t fully resolve the issue
- Cracks in tiled areas or movement in floor tiles
An expert can carry out moisture testing, assess the existing waterproofing system, and determine whether repairs, partial reapplication, or a full re-waterproofing is necessary.

Inspection and Maintenance Tips
To extend the life of your waterproofing and avoid costly damage, regular inspections and maintenance are key.
Simple tips to prevent future issues:
- Inspect grout and silicone regularly—replace any that’s cracked, shrinking, or missing
- Avoid harsh cleaners that can degrade sealants and membranes over time
- Keep bathroom ventilated to minimise condensation and mould
- Check for signs of water damage every few months, especially around shower recesses and bath edges
- Schedule a professional inspection every 5–10 years, especially if you live in an older home
Catching small problems early is the best way to avoid major waterproofing failures down the track.
Key Takeaway: Identifying the signs your bathroom needs re-waterproofing—like a leaking shower, bubbling paint, or mould—is the first step to preventing long-term water damage. If you notice any red flags, don’t wait. Get a professional assessment to ensure your bathroom stays safe, dry, and structurally sound.
Final Tips for Ensuring Long-Term Waterproofing Success
Proper installation is only the beginning. To truly waterproof your entire bathroom for years to come, ongoing care and smart planning are essential. Whether you’ve just finished a renovation or want to maintain the integrity of your current setup, following a few best practices can deliver long-term protection and confidence that your bathroom remains safe from moisture damage.
Here are some expert-backed tips to preserve your waterproofing system and enjoy lasting peace of mind.
Routine Maintenance and Inspections
Regular upkeep is one of the simplest ways to catch small problems before they become major headaches.
- Check grout and silicone lines every few months for cracks, gaps, or signs of shrinkage
- Clean tiles and joints gently—avoid abrasive cleaners that can wear away seals
- Look for subtle signs of moisture like dark spots, soft flooring, or mildew odour
- Test exhaust fans to ensure your bathroom stays well-ventilated and dry.
- Ventilation is one of the most underrated components—regularly maintaining exhausts or investing in proper bathroom ventilation system installation can help extend your waterproofing’s lifespan.
- If your layout involves limited storage or tight corners, consider integrating bathroom storage solutions to keep the space organised and dry.
- Book a professional inspection every 5–10 years, especially in older homes or high-use bathrooms
These simple actions can extend the life of your waterproofing system and keep your bathroom in top condition.
Tips to Avoid Common Waterproofing Failures
Even high-quality materials can fail if installation or maintenance is neglected. Here’s how to avoid the most common causes of waterproofing breakdown:
- Don’t cut corners during renovations—ensure all wet areas are properly sealed, not just the obvious ones
- Never tile over damaged waterproofing without proper assessment and repair
- Allow full curing time for membranes (usually 24–48 hours) before tiling or use
- Use compatible products—mixing membranes, adhesives, or sealants from different brands can cause failures
- Engage licensed contractors who understand Australian standards and local code requirements
By staying proactive and informed, you can prevent problems like mould, leaks, and costly structural repairs.
When Planning a Bathroom Renovation
If you’re about to renovate, preparing for a bathroom demolition and planning waterproofing should be top priorities—not afterthoughts. It’s your first line of defense against long-term damage and a requirement under the Building Code of Australia.
Key tips for renovators:
- Plan waterproofing early in the renovation timeline to avoid delays
- Choose a licensed waterproofing specialist to ensure code compliance
- Select quality, durable materials that suit your bathroom layout and usage
- Discuss eco-friendly and smart-home compatible options if applicable
- Budget for full waterproofing, not just partial areas like the shower
A well-waterproofed bathroom is one that lasts—adding value, comfort, and reliability for years to come.
Speak to a Licensed Waterproofing Specialist in Sydney. At In House Plumbing, we bring over 20 years of expertise to every project.
Whether you’re upgrading your ensuite or building a wet room from scratch, our team delivers waterproofing solutions that meet Australian standards—and give you lasting peace of mind. Reach out today to learn more or request a personalised quote.
Frequently Asked Questions About Bathroom Waterproofing
Here are some of the most common questions Sydney homeowners ask when it comes to bathroom waterproofing. These quick answers will help you make informed decisions and avoid common pitfalls.
The cost to waterproof a bathroom in Sydney typically ranges from $500 to $1,800, depending on the size of your bathroom, its condition, and the complexity of the layout. Smaller bathrooms like ensuites may cost less, while large wet rooms or bathrooms requiring repairs will be on the higher end. This cost generally includes materials, labour, and compliance with Australian standards.
Yes. In New South Wales, any bathroom waterproofing must be carried out by a licensed contractor. This is required under NSW Fair Trading laws and ensures the work complies with national standards (AS 3740). DIY waterproofing without a license can result in failed inspections, voided insurance, and long-term damage.
The primary standard for domestic bathroom waterproofing is AS 3740 – Waterproofing of Domestic Wet Areas. This outlines the required materials, membrane coverage, and performance guidelines to ensure effective moisture protection. Complying with these standards is mandatory and typically verified by a licensed professional.
Waterproofing involves creating a comprehensive, flexible barrier—usually with membranes—that protects all wet areas from moisture intrusion. Sealing, on the other hand, generally refers to applying products like silicone or grout sealant to visible surfaces (e.g., tile joints) to prevent surface water penetration. Sealing is not a substitute for proper waterproofing.
Not in NSW. While you can assist with prep work (like cleaning or removing tiles), applying a waterproofing membrane must be done by a licensed contractor to comply with state laws and meet building codes. DIY attempts without a license can lead to serious waterproofing issues, including structural damage and insurance complications.
Still have questions? Our team at In House Plumbing is happy to help. Contact us for expert advice or to schedule an inspection with a licensed waterproofing specialist in Sydney.