Plumbing Checklist Before Tiling Your Bathroom

Laying tiles before finalizing your plumbing setup leads to costly delays and plenty of stress. Many Sydney renovators have learned this the hard way after tearing up freshly laid floors. Use this plumbing checklist before tiling to prevent errors with drain alignment, fixture locations, waterproofing, and inspections.
Key Takeaways
- Complete rough-in plumbing early. This includes precise positioning of taps, drains, and mixers.
- Pressure-test all water supply and drainage lines. Make sure heights and slopes are accurate before tiles go down.
- Finish waterproofing after plumbing. Review every seal and make sure bracing around fixtures is solid.
- In NSW, any major plumbing changes require an inspection or a Certificate of Compliance.
- Always double-check fixture specifications in person. Floorplans and online visuals aren’t enough.
Lock In Key Plumbing Before Tiling Starts
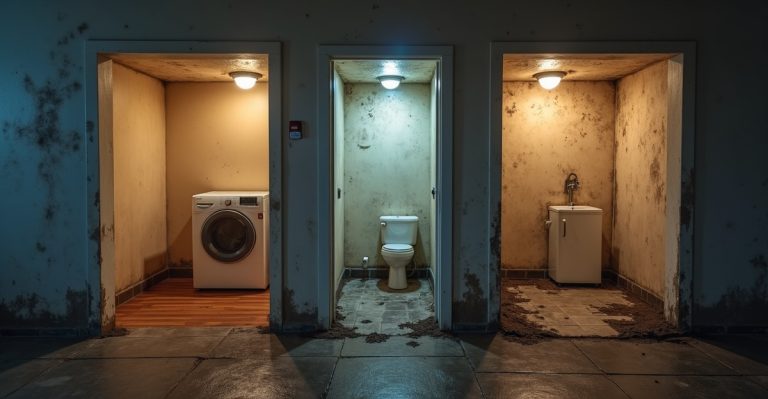
Before you break open a tile box, there are a few plumbing essentials that need sorting. Missing even one step can lead to big headaches later—like having to rip up brand-new tiles to re-run a pipe. That’s exactly what happened on one of our Inner West Sydney jobs where a toilet rough-in was just 3 centimetres off. The floor had to be re-tiled from scratch.
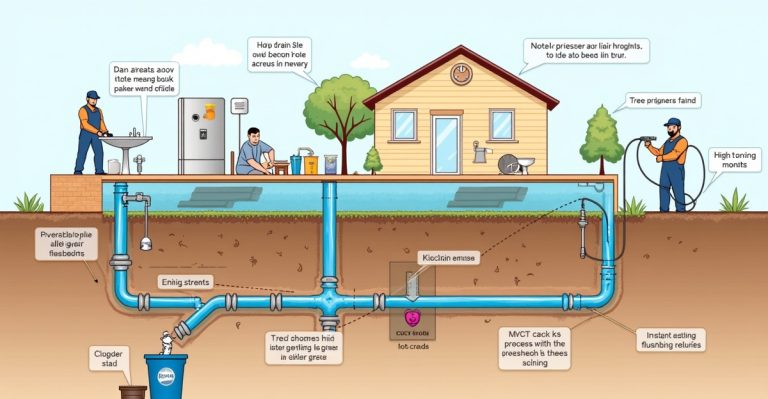
The most important step? Get the rough-in plumbing done early. This means confirming the location and connection points for your toilet, vanity, shower and taps. Every fixture relies on correct placement.
Sydney homes, especially older ones or apartments, often come with tight spaces and shifted pipes. Always double-check your specs and measurements. Don’t trust the plan—measure the actual product.
Here’s the plumbing checklist before tiling bathroom surfaces:
- Hot and cold water lines should be installed and pressure tested
- All drainage pipes set at correct heights and angles
- Venting systems factored into the design
- Every fixture should have accessible shut-off valves
Take the time now to get it right—it’ll save you a much bigger mess down the track. If you’re unsure how this part fits into the big picture, this quick read on the right plumbing sequence during renovations can help.
Check Your Drain and Pipe Positions — Twice
Once tiles go down, there’s no easy fix for misaligned drains or pipework. This is one area where you want to slow down and get it perfect.
A common problem we see in Sydney bathroom renovations is the fall—the slope needed for water to drain. If it’s wrong, water pools or flows the wrong way. Shifting a drain even slightly after tiling means busting through your floor.
During this part of your bathroom plumbing checklist, confirm:
- Shower floor waste is centered and sloped correctly
- The toilet set-out is aligned to match your pan
- Vanity waste and basin drain outlets are at proper height for your cabinets
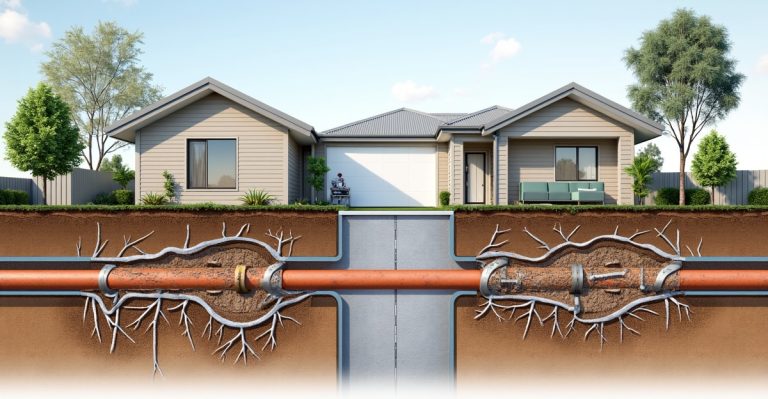
With older homes in Sydney, especially pre-1980s builds, pipes may need complete rerouting to meet current standards. It’s worth checking if those waste pipes are still compliant or need refreshing. We always recommend assessing your pipes during a renovation—it saves you working backwards later.
And before any tiling goes near those pipes, run pressure and leak tests. Catching leaks now is easy. After tiling, it’s major rework. If you need help with pipe repairs or pressure testing, we’re happy to take a look.
Get Waterproofing and Plumbing Talking to Each Other
Plumbing and waterproofing need to work together—from timing to technique. Tiling over a poorly sealed penetration is asking for a soggy surprise a few months later.
This is especially true in Sydney’s terraces and semis with older walls or timber-framed bathrooms. We’ve seen more than a few where a bad seal around a tap led to water behind the tile and into the next room.
Make sure before tiling:
- Taps, mixers, and drains are sealed and sleeved properly
- Shower niches and vertical surfaces are waterproofed only after the plumbing is in and final
- Every mixer, outlet or riser is braced securely for its finish height
Your waterproofer and plumber should check these items together. No finger-pointing when something leaks—just one solid walk-through before tiling starts.
Want to dig deeper? We’ve answered a common question—does waterproofing or plumbing come first?—with tips from real site experience.
Don’t Tile Over Uninspected Work
Swapping tapware is one thing. But if you’ve shifted waste pipes or added any new outlets, you might need a plumbing inspection before the tiling crew arrives.
In NSW, major plumbing works need to be certified and approved by a licensed plumber. Tiling over unreported changes can void warranties or even cause issues with insurance down the track.
Before that first tile is glued, check:
- Work complies with AS/NZS 3500 Plumbing Code
- Inspections are done, or a Certificate of Compliance has been issued
- Any required Notice of Work or council docs are submitted
This step is especially important if you’ve done part of the work yourself or with a handyman. Even a single DIY drain change still needs a licensed check to be legal and safe. Thinking about what’s involved in rough-in plumbing and why it matters? It explains what’s lock-in critical before moving to finishes.
Need help? We offer leak checks and inspections across Sydney before tiling begins.
Plan for Fixture Installations Later—But Rough In Now
You might not be dropping your new toilet or vanity in just yet—but the plumbing must be ready for them, to the millimetre.
Rough-in now means pipes, mixers, drains, and inlets are all pre-set to match the specs of the final fixtures. We’ve seen it too many times: wrong mixer height, and the tiler cuts a hole in the wrong spot. That leads to extra costs, not to mention a poor finish.
Measure every fixture yourself—don’t rely on online images. Confirm:
- Shower mixers are positioned at final tile height
- Recessed niches and riser pipes don’t clash
- Vanity tap sets and waste align with cabinetry drawings
- Toilet water inlets don’t interfere with skirting or walls
On a Northern Beaches job, wall pipes were placed before final shelving locations were known. When the drain clashed with the back wall, the shelf had to be rebuilt.
Pre-checking pipe runs helps avoid problems later. Here’s our plumbing planning guide for more tips before your renovation starts.
Need a Hand Before You Tile?
Not 100% sure your bathroom is ready for tiles? No shame in that—you wouldn’t believe how many projects stall because of missed plumbing steps.
Getting a quick once-over now can save you thousands in rework. Whether you’re managing the reno yourself or working with a builder, we’re happy to double-check everything.
We work across the Inner West, Northern Beaches and all over the Hills. We’ve helped plenty of locals get peace of mind before the tile glue gets mixed.
Looking for a trusted local plumber in Sydney? Or need backup fast? We’re ready.
Call us anytime or book online. And keep an eye out—our printable “Pre-Tiling Plumbing Checklist” PDF is coming soon for your toolbox.
Need a second opinion before you tile? Give In House Plumbing a call — we’re happy to help.