What to Expect During a Full Bathroom Demolition

Planning a bathroom renovation often starts with one essential step: bathroom demolition. This process goes far beyond pulling out old tiles or removing a vanity—it’s a carefully planned stage that ensures your space is safe, cleared, and ready for the transformation ahead.
In this guide, you’ll discover exactly what happens during demolition, how to prepare, and what to expect along the way so you can make confident, informed decisions.
Here’s what we’ll cover:
- What Bathroom Demolition Really Involves
- Why a Full Bathroom Demolition Might Be Needed
- How to Prepare Your Home for Bathroom Demolition
- Safety First – Protecting People and Property
- Step-by-Step Bathroom Demolition Process
- DIY Bathroom Demolition vs Hiring a Professional
- Common Surprises During Demolition
- After the Demolition – What’s Next?
- Conclusion – A Stress-Free Bathroom Demolition
First, let’s look at why a full bathroom demolition might be needed before your renovation can begin.

What Bathroom Demolition Really Involves
A bathroom strip out and removal is the first major step in transforming an old, worn-out space into a fresh, functional one. In simple terms, it’s the process of carefully dismantling and removing everything in the bathroom that needs replacing—fixtures, tiles, flooring, and sometimes even the walls and subfloor—so you have a clean slate for your bathroom renovation.
Think of it as clearing the stage before the main performance: without this step, you can’t build a safe, durable, and well-finished new bathroom.
It’s also one of the most critical stages in the bathroom renovation process because it sets the tone for everything that follows. A well-planned demolition not only makes the rebuild smoother but also helps uncover hidden issues like water damage, mould, or outdated bathroom plumbing that need attention before new materials go in.
Skipping steps or rushing through this phase can lead to costly delays, unexpected repairs, or even safety hazards down the track.
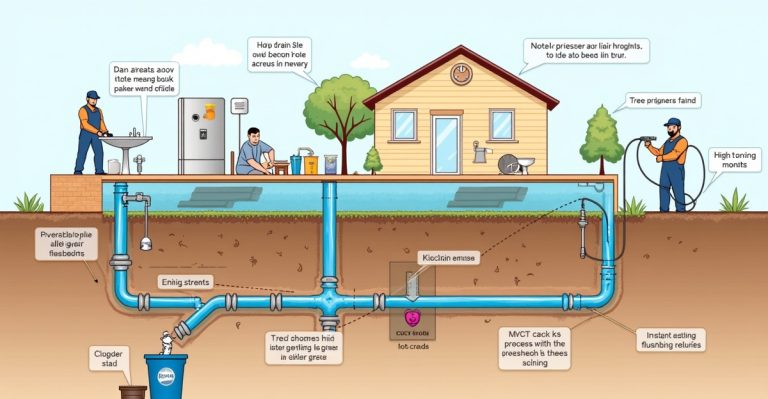
During demolition, safety and precision are just as important as speed. From shutting off the water and electricity to controlling dust and debris, every step is designed to protect your home, your health, and the tradespeople working on site.
In Sydney, that also means following local rules for waste disposal and asbestos management—regulations that ensure the work is safe, legal, and environmentally responsible.
Key takeaway: Bathroom demolition isn’t just about tearing things out—it’s about preparing your space properly so your renovation starts on the right foot, with no hidden surprises and a solid foundation for the work ahead.

Why a Full Bathroom Demolition Might Be Needed
There are plenty of reasons why homeowners and property managers in Sydney decide to take on a full bathroom demolition rather than just a quick cosmetic refresh. In many cases, it’s the only way to address underlying problems and create a bathroom that’s not only beautiful but also safe, functional, and built to last.
1. Outdated fixtures and finishes
Over time, styles change—and so do the standards for comfort and efficiency. Old vanities, discoloured tiles, and worn flooring can make the entire space feel tired. Beyond appearance, older fixtures may use more water or energy, adding unnecessary costs to your bills.
A full demolition allows you to remove everything at once, making way for modern, water-efficient fittings and fresh, durable materials.
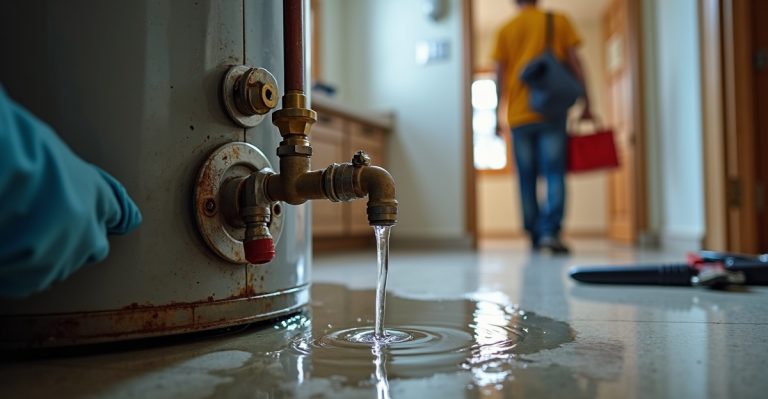
2. Water damage or mould
Bathrooms are high-moisture environments, which means leaks or poor ventilation can lead to hidden damage behind walls and under floors. Left untreated, this can compromise the structure of your home and create health risks.
A complete tear-out makes it possible to identify and repair water-damaged timbers, replace mouldy wall linings, and improve bathroom waterproofing before rebuilding. If mould is present, you may also need bathroom mould remediation to ensure a safe environment.
3. Structural or layout changes
If you’re planning to relocate plumbing fixtures, enlarge the shower, or completely change the room’s layout, you’ll need to start from scratch.
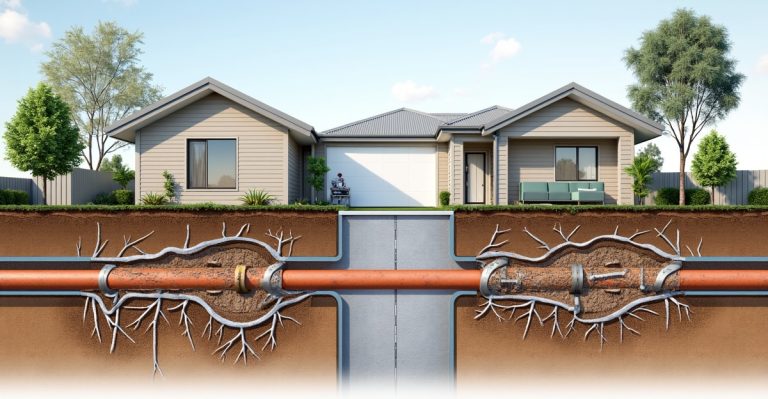
Demolition gives you the blank canvas required for moving pipes, wiring, and walls without working around outdated infrastructure. This is especially important in older Sydney homes, where plumbing and bathroom electrical services may not meet current standards.
4. Preparing a property for sale or rental
In competitive property markets, a freshly renovated bathroom can be a major selling point. A full demolition ensures you can upgrade everything from the ground up, giving buyers or tenants confidence in the quality of the work.
Plus, it helps avoid the awkward “half-renovated” look that can happen when old and new elements are mixed.
Key takeaway: Whether it’s about style, safety, function, or property value, a full bathroom demolition creates the opportunity to rebuild with confidence—knowing you’ve addressed every issue before the new design takes shape.

How to Prepare Your Home for Bathroom Demolition
Good preparation can make the difference between a smooth bathroom demolition and a stressful, messy experience. Taking the time to organise permits, set expectations, protect your home, and gather the right tools will save you time, money, and headaches once work begins.
Securing Permits and Approvals in Sydney
In Sydney, certain demolition work—especially if it involves structural changes, plumbing alterations, or asbestos removal—may require council approval or compliance with NSW building codes.
If your project includes moving walls, altering drainage, or removing load-bearing structures, check with your local council before starting. Licensed tradespeople can guide you through these requirements and ensure all work meets Australian Standards.
For asbestos, NSW law is clear: if asbestos is suspected, it must be tested and, if present, removed by a licensed asbestos removalist. For more details, see the official SafeWork NSW Code of Practice for safely removing asbestos.
Setting a Realistic Timeline
Bathroom demolition can take anywhere from a single day to a full week, depending on the room size, complexity, and whether you’re doing it yourself or hiring professionals. Factor in extra time for:
- Unexpected findings like water damage or faulty wiring.
- Permit processing if required.
- Specialist trades such as asbestos removal or structural work.
Being realistic about timeframes and planning your renovation and demolition budget helps manage expectations and prevents unnecessary stress if delays occur.
For a broader perspective on renovation planning, check out this guide to the timeline for a complete bathroom remodel.
Protecting Surrounding Areas and Belongings
Demolition work creates dust, noise, and vibrations that can travel beyond the bathroom. Before starting:
- Cover floors and doorways with protective sheets or drop cloths.
- Remove or secure items in adjoining rooms.
- Seal vents or ducts to stop dust from circulating.
These simple steps help keep the rest of your home clean and safe during the process.
Tools and Materials Needed
While a professional team will bring all necessary gear, if you’re handling demolition yourself you’ll need some basics, including:
- Safety equipment (gloves, safety glasses, dust masks, hearing protection).
- Pry bars and hammers for tile and fixture removal.
- Buckets or tubs for debris collection.
- A sturdy wheelbarrow or skip bin for waste disposal.
Always prioritise safety—never use tools you’re unfamiliar with, and follow the manufacturer’s instructions.
Key takeaway: A little preparation goes a long way. By securing the right permits, setting a clear timeline, protecting your home, and equipping yourself properly, you’ll create the best possible starting point for a safe, efficient bathroom demolition.

Safety First – Protecting People and Property
When it comes to bathroom demolition, safety isn’t optional—it’s essential. From the health risks of asbestos to the hazards of live wiring, the demolition stage is where thorough planning and cautious execution protect both people and property. Here’s how to keep the process safe and compliant in Sydney.
Asbestos Inspection and Removal
Many older Sydney homes, especially those built before the late 1980s, may contain asbestos in wall sheeting, flooring underlays, or ceiling linings. Disturbing asbestos without proper handling can release dangerous fibres into the air, posing serious health risks.
Under NSW law, if asbestos is suspected:
- It must be tested by a licensed assessor.
- Any removal over 10 square metres must be carried out by a licensed asbestos removalist.
- Waste must be sealed, labelled, and transported to an approved disposal facility.
Never attempt to remove asbestos yourself—it’s both illegal and unsafe.
Turning Off Water and Electricity Safely
Before any demolition work begins, it’s critical to:
- Shut off the main water supply and drain any remaining water from pipes.
- Turn off electricity at the switchboard, and confirm with a qualified electrician that circuits are safe to work near.
Failing to disconnect services properly can lead to flooding, electrical shock, or fire hazards. A licensed plumber and electrician should always handle these tasks for complete safety.
Dust and Debris Control
Bathroom tear-outs can create fine dust from tile adhesive, grout, plaster, and concrete. Without control measures, this dust can spread through your home and even damage air quality. To minimise impact:
- Use plastic sheeting or zip walls to seal off the work area.
- Install temporary ventilation systems or consider bathroom ventilation system installation
- Wear appropriate respiratory protection during demolition.
Waste Disposal Rules in NSW
Demolition generates significant waste—tiles, fixtures, plasterboard, timber, and possibly hazardous materials. In NSW:
- Waste must be disposed of at licensed facilities, not general landfill.
- Asbestos waste has specific packaging, labelling, and transport requirements.
- Hiring a skip bin from a compliant waste contractor is the safest option.
By following these rules, you protect not just your household but also the environment.
Key takeaway: Safety during bathroom demolition means more than just wearing gloves—it’s about legal compliance, hazard control, and protecting everyone involved. Proper asbestos management, service disconnection, dust control, and waste disposal keep your project safe from start to finish.

Step-by-Step Bathroom Demolition Process
A successful bathroom demolition is all about working in the right order. This not only makes the job faster and cleaner but also helps you avoid unnecessary damage to your home. Here’s a breakdown of the typical sequence used by professionals in Sydney.
1. Disconnect Plumbing and Electrical
Before anything comes out, licensed trades will shut off the water supply, drain the pipes, and cap them securely to prevent leaks. Electrical circuits connected to the bathroom are switched off at the mains and isolated, ensuring safe access to outlets, lighting, and exhaust fans. This step is essential for preventing flooding, electrical shocks, or accidental fires.
2. Remove Fixtures and Fittings
With services safely disconnected, the next step is taking out larger items:
- Vanity and sink – disconnected from plumbing, then unscrewed and lifted out.
- Bathtub or shower unit – carefully removed to prevent damage to surrounding walls or floors.
- Toilet – drained, unbolted, and capped at the waste outlet.
Where possible, salvageable fixtures can be set aside for reuse or donation.
3. Take Out Wall and Floor Tiles
Tiles are removed using hand tools or small demolition hammers, starting from the top and working down. Care is taken to avoid damaging underlying structures if they’re to be retained.
For floor tiles, adhesive and bedding material are chipped away to expose the subfloor. If you’re wondering how to demolish a bathroom or remove tiles without damage, the answer is patience and the right tools—a slow, controlled approach works best.
Careful removal avoids damage to structures.
4. Remove Subfloor or Wall Linings (If Required)
If inspections reveal water damage, rot, or mould, subfloors or wall linings may need to be completely replaced. In older homes, this step is also when asbestos-containing materials may be removed under strict safety procedures.
Removing these layers allows for new waterproofing, plumbing rough-ins, and structural repairs.
5. Dispose of Waste Safely and Legally
Once everything is removed, debris is sorted and disposed of according to NSW waste disposal rules.
- General building waste goes to licensed recycling or disposal facilities.
- Hazardous waste, including asbestos, follows strict packaging, labelling, and transport regulations.
- Using a compliant skip bin provider ensures waste is handled responsibly and legally.
Key takeaway: By following a clear step-by-step process—starting with safe service disconnection and ending with compliant waste disposal—you’ll set your renovation up for success, minimise risks, and avoid costly mistakes.

DIY Bathroom Demolition vs Hiring a Professional
When planning a bathroom demolition, one of the first decisions you’ll face is whether to tackle it yourself or call in an experienced crew. Both options have their place—but the right choice depends on your skills, time, budget, and the complexity of the job.
Pros and Cons of DIY
Pros:
- Potential cost savings on labour.
- Full control over the pace and order of work.
- Satisfaction of doing it yourself.
Cons:
- Requires the right tools, safety gear, and know-how.
- Physically demanding and time-intensive.
- Higher risk of damaging plumbing, electrical, or structural elements.
DIY might be reasonable for small, straightforward strip-outs—such as removing a vanity or taking up floor tiles—but anything involving structural changes, asbestos, or major plumbing/electrical work is best left to professionals.
Risks of DIY
- Safety hazards: Live wires, pressurised water lines, and sharp debris can cause serious injury.
- Compliance issues: Unlicensed work on plumbing or electrical systems can result in fines and insurance problems.
- Unexpected problems: Discovering hidden mould, asbestos, or structural damage without knowing how to address it can halt the project.
- Time delays: What might take a professional team a day could stretch into a week for an inexperienced DIYer.
Benefits of Professional Services
- Expertise: Licensed trades know how to disconnect services safely, remove materials efficiently, and handle surprises without delay.
- Compliance: Professionals understand NSW regulations for waste disposal, asbestos removal, and building code requirements.
- Speed: Professional bathroom demolition services offer a coordinated crew that can complete a full demolition in a fraction of the time it would take most homeowners.
- Cleanliness: Pros use dust control, protective sheeting, and organised waste removal to minimise disruption to the rest of your home.
Cost Considerations
While DIY demolition may seem cheaper, the cost to gut a bathroom can quickly add up if you need to hire specialized tools, pay for multiple waste pickups, or fix accidental damage. The cost of full bathroom demolition in Sydney typically ranges based on the size of the room, ease of access, and complexity of the work.
In many cases, the efficiency, compliance, and reduced stress of hiring a pro outweigh the upfront savings of doing it yourself.
Key takeaway: If your project is small, straightforward, and you’re confident in your skills, DIY can work. But for most full bathroom demolitions—especially in older Sydney homes—a professional service offers speed, safety, compliance, and peace of mind.

Common Surprises During Demolition
Even with the best preparation, bathroom demolition can reveal unexpected problems hiding behind tiles, under floors, or inside walls. These discoveries are often impossible to spot until the space is fully stripped back—which is exactly why demolition is such a critical stage in the renovation process.
Hidden Water Damage
Small leaks from pipes, taps, or shower bases can cause long-term damage that remains out of sight for years. During demolition, you might find swollen timber, soft plasterboard, or rusted fittings where moisture has been slowly seeping in. Left untreated, this can compromise the structural integrity of the room and lead to further repairs before the rebuild can start.
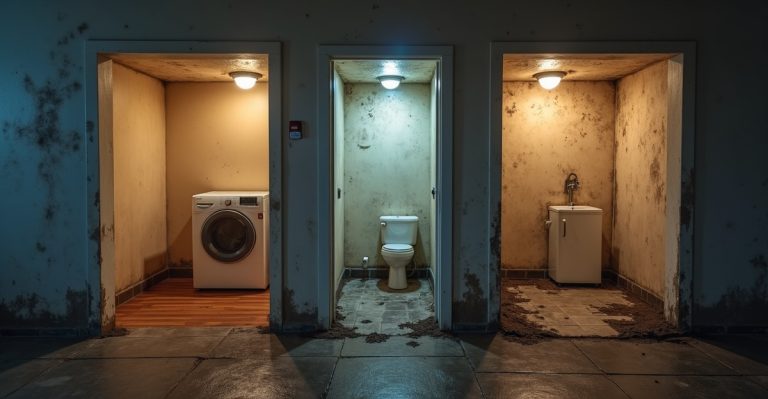
Mould or Pests
Bathrooms are naturally humid, making them a prime spot for mould growth—especially if ventilation has been poor. Demolition can also uncover signs of pests like termites or cockroaches that have made a home in damp wall cavities. Addressing these issues early ensures your new bathroom is built on a clean, healthy foundation.
Outdated Plumbing or Wiring
In older Sydney homes, it’s common to find plumbing and electrical systems that don’t meet current Australian Standards. This might mean old galvanised pipes, brittle wiring, or DIY modifications from a past owner. Bringing these systems up to code during the renovation phase not only improves safety but also answers the question of should you replace pipes in a bathroom remodel.
Key takeaway: Surprises during bathroom demolition aren’t always bad—they’re opportunities to fix hidden problems before they affect your new renovation. Addressing them now ensures your finished bathroom will be safe, compliant, and built to last—while helping you avoid future insurance implications of bathroom plumbing problems.

After the Demolition – What’s Next?
Once the space is cleared, the next step is preparing for the rebuild—this often includes bathroom fixture installation and other rough-in work before waterproofing and tiling.
Clean-Up and Inspection
A thorough clean-up removes any leftover debris, dust, and sharp objects from the demolition site. This not only makes the area safer to work in but also allows for a detailed inspection of the underlying structure. Licensed trades will check for:
- Signs of structural damage or rot.
- Any lingering moisture issues.
- The condition of joists, wall studs, and subflooring
If any issues are found, they can be repaired now—before new materials are installed.
Preparing for the Renovation Stage
With a clear and stable workspace, the next phase is getting the room ready for construction:
- Plumbing rough-in: Installing or relocating pipes and drainage in line with the new bathroom layout.
- Electrical rough-in: Running new wiring for lighting, outlets, and appliances.
- Layout verification: Double-checking measurements and clearances for fixtures like the shower, vanity, and toilet.
This preparation stage ensures everything behind the walls and under the floor is ready—making it a smart time to decide between doing waterproofing yourself or hiring a licensed expert.
Setting the Stage for Your Remodel
Think of demolition as resetting the clock on your bathroom—it gives you a blank canvas to create exactly what you want, setting the stage for the full bathroom renovation process. A clean, inspected, and prepped space means your renovation team can move forward quickly and confidently, keeping your project on schedule and your investment protected.
Key takeaway: After demolition, the goal is to leave the space spotless, structurally sound, and ready for the skilled work that turns a bare room into your dream bathroom. This is where careful planning pays off, setting the tone for a smooth and successful remodel.

Conclusion – A Stress-Free Bathroom Demolition
A full bathroom demolition is more than just tearing out old fixtures—it’s a careful, step-by-step process that lays the groundwork for a safe, functional, and beautiful new space. From securing permits and preparing your home, to following a clear demolition sequence and addressing any hidden surprises, each stage plays a vital role in ensuring your renovation starts on the right foot.
By understanding what’s involved—and following our Sydney bathroom demolition checklist—you can approach the process with confidence, whether you’re taking on small DIY tasks or bringing in a professional team.
In Sydney, working with licensed experts means you’ll have peace of mind that the job is completed safely, complies with local regulations, and stays on schedule.
If you’re ready to start your renovation journey, why not make the first step the easiest one? In House Plumbing offers a complete bathroom removal service Sydney residents can trust, handling every aspect of your bathroom demolition with precision and care.
Need expert help with your bathroom demolition? Get in touch with our friendly Sydney team today and let’s make your project stress-free from start to finish.
Frequently Asked Questions
For a standard-sized bathroom in Sydney, professional demolition usually takes 1–3 days. The timeline can be longer if the space is large, if there are structural changes, or if issues like asbestos or water damage are found during the process. DIY projects often take longer due to the learning curve and fewer hands on the job.
In most cases, basic demolition that doesn’t involve structural changes may not require a permit. However, if you’re moving walls, altering plumbing or electrical systems, or removing asbestos, council approval or compliance with NSW building regulations is necessary. It’s always best to check with your local council or work with a licensed contractor who can advise you.
Yes, you can, but only if you’re confident, have the right tools, and the work doesn’t involve licensed trades. Plumbing disconnection, electrical isolation, and asbestos removal must be handled by qualified professionals under NSW law. Even for simpler DIY tear-outs, safety gear and proper preparation are essential.
Wear gloves, safety glasses, and a dust mask or respirator.
Shut off water and electricity before starting.
Use sturdy tools and handle heavy items with care.
Contain dust with plastic sheeting and proper ventilation.
Never attempt asbestos removal without a licence—it’s dangerous and illegal.
All waste must be taken to a licensed disposal or recycling facility. Asbestos must be sealed, labelled, and transported according to strict NSW regulations. Hiring a skip bin from a compliant provider is the safest way to manage demolition debris, as they’ll ensure it’s sorted and disposed of legally.