Signs Your Waterproofing Is Failing—And How to Fix It

If you’ve noticed strange smells, bubbling paint, or unexplained damp patches in your home, you could be facing the early signs of waterproofing failure. Left unchecked, these seemingly minor issues can lead to serious water damage, costly repairs, and even structural problems.
In this article, we’ll walk you through how to identify these red flags early, understand what causes them, and explore both DIY fixes and professional solutions—so you can protect your property and your peace of mind.
Here’s what we’ll cover:
- Common Signs of Waterproofing Failure
- What Causes Waterproofing to Fail
- What to Do If You Spot These Signs
- How to Prevent Future Waterproofing Failures
- Why Hiring a Qualified Professional Matters
Let’s start by looking at the most common signs of waterproofing problems—and how to spot them before they escalate.
Common Signs of Waterproofing Failure
When waterproofing begins to deteriorate, your home will often try to tell you—subtly at first, and then more urgently. Recognising these early warning signs can help you catch problems before they evolve into expensive structural repairs or hazardous living conditions.
Here are some of the most common and telling indicators that your waterproofing may be failing:

Musty Odours or Mould Growth
If you’ve walked into a room and noticed a persistent damp or earthy smell, especially in basements or bathrooms, that’s more than just unpleasant—it’s often the first red flag of moisture intrusion. Mould and mildew thrive in humid environments, particularly where there’s ongoing water ingress behind walls or under floors—another reason to prevent musty bathroom smells before they become a health issue.
In real-life scenarios, you might find:
- A musty smell that doesn’t go away, even after cleaning
- Small black or green spots forming in corners or behind furniture
- Mould patches on ceilings or along window sills
This is often the result of hidden leaks, condensation, or a cracked waterproof membrane—issues that can quickly escalate if ignored. For mold-related damage in bathrooms, Bathroom Mold Remediation can be a critical solution to restore air quality and hygiene. For more on the health risks and safe handling of mould, visit the EPA’s guide on mold.

Peeling Paint, Bubbling Surfaces, or Stains
When water begins to seep into your walls, the internal finishes start to show distress. Look out for:
- Peeling paint or blistering wallpaper, particularly in bathrooms or lower levels
- Bubbling patches on painted walls
- Brown, yellow, or rust-coloured stains on ceilings and upper walls
These water damage indicators usually stem from seepage problems behind the surface, pointing to a failure in the Bathroom Waterproofing layer or roof membrane issues.

Damp Patches, Wall Cracks, or Efflorescence
Damp or discoloured areas on walls and floors—especially near skirting boards—can suggest structural dampness or rising moisture from below. In some cases, you’ll also spot:
- Hairline cracks in walls or floor joints
- Efflorescence: white, chalky deposits left behind when water evaporates and salts remain
- Surfaces that feel cold or wet to the touch
These symptoms may not look dramatic, but they often indicate deeper waterproofing failures or foundation issues that warrant attention. If wall repairs are needed after water damage, consider professional Bathroom Wall Repair services.

Basement Moisture and Leaks
Basements are especially vulnerable due to their location below ground level. Even with previous waterproofing, issues like blocked weep holes, cracked foundations, or poor drainage can allow water to seep in over time.
You may notice:
- Pools or puddles after heavy rain
- Constant dampness under stored items
- Water tracks along the walls or floors
- A “clammy” feeling in the air, even with ventilation
Basement issues are not just cosmetic—they’re early signs of more serious building envelope failure and should be assessed promptly.
Takeaway: If you’re noticing one or more of these signs, it’s time to take them seriously. Early detection is your best defense against extensive damage, and knowing what to look for is the first step toward protecting your home or property.
What Causes Waterproofing to Fail
Understanding the root causes of waterproofing failure—including the common reasons waterproofing fails due to drainage problems—can help you take more effective action and prevent repeat issues.
In most cases, the visible signs of damage are just the tip of the iceberg.
Here’s a breakdown of the most common underlying causes and how they connect to the symptoms we covered earlier.

Aging or Damaged Membranes
Waterproofing membranes are your home’s first line of defense against water ingress—but like all building materials, they have a lifespan. Over time, they can dry out, crack, tear, or delaminate, especially if they were poorly installed or exposed to extreme weather.
What it leads to:
- Water stains on ceilings or walls
- Peeling paint or bubbling surfaces
- Damp patches in bathrooms, basements, or on exterior walls
If your home is more than 10–15 years old and hasn’t had recent waterproofing work, membrane deterioration is a likely culprit. In such cases, a complete Bathroom Renovation may be the best opportunity to modernise and protect your space.
You can also refer to our best waterproofing membrane guide to learn which products offer the most durable and long-term protection for your specific situation. And if you’re planning a new project, our step-by-step guide to waterproofing a bathroom walks you through the essential materials, methods, and compliance tips for getting it right the first time.

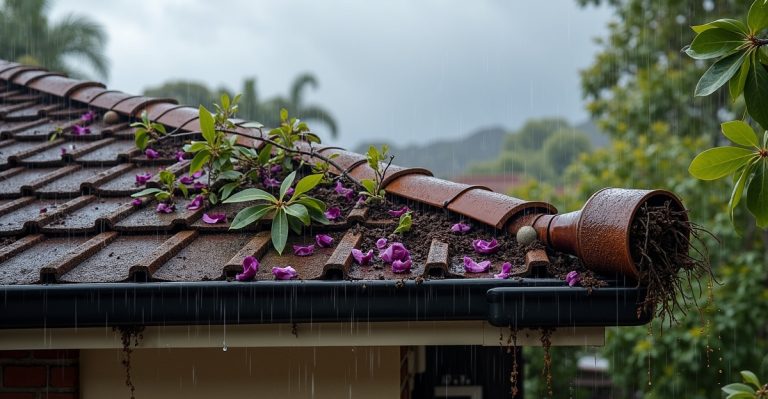
Poor Drainage or Blocked Weep Holes
Even the best waterproofing system can’t do its job if water has nowhere to go. Blocked gutters, downpipes, or weep holes (small openings in brickwork that allow water to escape) can cause water to back up and seep into unintended areas.
Common signs:
- Moisture pooling at the base of exterior walls
- Musty odours in lower-level rooms
- Patches of efflorescence on brick or concrete
Tip: Regularly cleaning your gutters and ensuring downpipes are clear can prevent unnecessary water pressure on your home’s waterproofing.

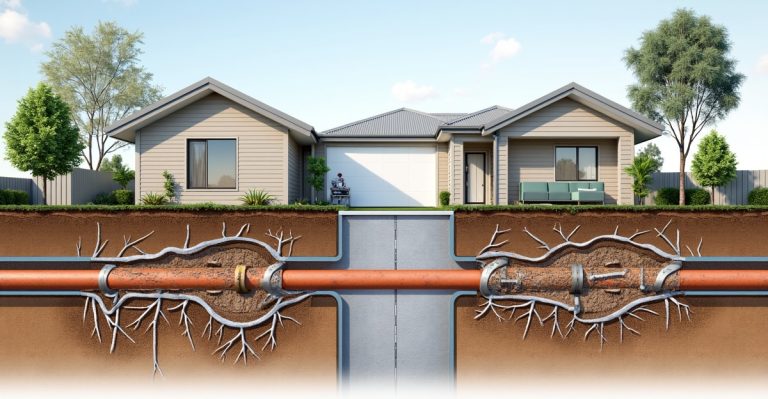
Construction Defects or Grading Issues
Sometimes, the problem lies in how the home was originally built. Improper slope grading, inadequate membrane overlap, or missing sealant layers can allow water to collect in vulnerable areas—particularly around balconies, retaining walls, or foundation lines.
Symptoms you might see:
- Warped floorboards or soaked skirting boards
- Basement leaks after heavy rain
- Recurring seepage in the same spots, even after patch repairs
Poor design choices can silently undermine waterproofing systems over time—especially in properties built on slopes or clay soil.

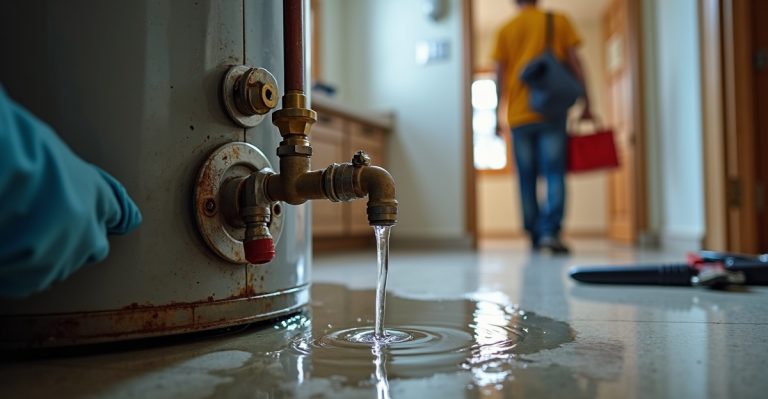
Plumbing Leaks Behind Walls
Waterproofing failure isn’t always caused by the elements—sometimes, it starts from within, such as with using the right sealant for taps to prevent hidden leaks.
Leaking pipes behind walls, under floors, or within ceilings can saturate structural materials before you even notice a visible issue.
Look out for:
- Sudden dampness in previously dry areas
- Localised mould growth in spots not near external walls
- Increased water bills without explanation
Because these leaks are hidden, they often mimic the signs of external waterproofing failure, making professional diagnosis essential. Plumbing inspections can help confirm whether internal pipework is contributing to the issue.
One advanced tool professionals use is thermal imaging for leak detection, which allows them to locate hidden moisture without damaging walls or floors.
Takeaway: Each waterproofing symptom has a story behind it. By understanding what causes these failures—whether it’s age, poor drainage, bad design, or hidden plumbing—you’re better equipped to respond with the right fix instead of just treating the surface.

What to Do If You Spot These Signs
Noticing the signs of waterproofing failure is the first step—knowing how to respond is what protects your home from lasting damage. While some early symptoms can be addressed with simple maintenance, others point to deeper issues that require a qualified professional.
Here’s how to take smart, timely action.
Quick Actions You Can Take Yourself
For minor warning signs or early-stage issues, there are a few practical steps you can take as a homeowner:
- Clean gutters and downpipes: Clogged drainage systems are one of the most common causes of water overflow and seepage. Clear away leaves, dirt, and blockages to ensure water flows away from your property.
- Check and unblock weep holes: Make sure that small drainage openings in brick walls aren’t sealed shut by paint, debris, or mortar.
- Use a moisture meter: Affordable handheld devices can help you detect elevated moisture levels in walls or floors—particularly useful for identifying hidden issues early.
- Seal minor cracks: Small hairline cracks in external walls or tile grout can often be sealed with waterproof caulking or silicone-based fillers as a short-term measure.
These steps won’t resolve major waterproofing problems, but they can slow the progression of damage while you decide your next move.
When to Call a Professional
While it’s tempting to DIY your way out of a water issue, there are clear red flags that signal it’s time to bring in an expert—especially when you’re weighing the choice of DIY vs. professional waterproofing.
- Recurring dampness in the same area despite previous repairs
- Visible mould or bubbling paint across multiple surfaces
- Persistent musty smells that don’t go away with cleaning
- Leaks during heavy rainfall, especially in basements or lower levels
- Uncertainty about the source of the moisture
If you’re dealing with anything more than surface-level dampness—or if your fixes haven’t held—it’s likely a deeper structural or drainage issue that requires professional tools and training to properly assess. You can get in touch with an expert to assess the scope of the problem and get personalised advice.
What a Waterproofing Specialist Might Recommend
When a qualified plumber or waterproofing expert inspects your property, they’ll look for the root cause of the issue before proposing a solution. Depending on the severity and location of the problem, they might recommend:
- Foundation crack injection using epoxy or polyurethane
- Basement tanking to create a sealed waterproof barrier
- Waterproofing membrane replacement, especially in older homes
- Installation of sump pumps in flood-prone basements
- French drain installation or other surface drainage solutions can effectively redirect water away from your foundation and reduce waterproofing strain.
- Infrared thermal imaging to detect hidden leaks
Most importantly, a professional can help with choosing the right waterproof membrane and ensure repairs are long-lasting, compliant with building codes, and tailored to your home’s unique conditions.
Takeaway: Start with quick maintenance tasks, but don’t ignore signs that point to bigger problems. Calling in a professional early can save you time, money, and a major headache down the line—especially when waterproofing failures are involved.

How to Prevent Future Waterproofing Failures
Once you’ve addressed a waterproofing issue—or even better, caught it early—it’s worth taking steps to reduce the chances of it happening again. Ongoing maintenance and modern technology can help protect your home from unnecessary moisture damage and give you peace of mind in the long run.
Routine Checks and Maintenance
Waterproofing isn’t a “set and forget” solution. Like most systems in your home, it benefits from periodic attention. With just a bit of proactive effort each season, you can extend the lifespan of your home’s protective barriers and avoid future headaches.
Here’s what to keep on your radar:
- Gutters and Downpipes: Clean them at least twice a year (especially in autumn) to prevent overflow and ensure proper drainage.
- Sealants and Caulking: Check window frames, balconies, external wall joints, and expansion gaps. Reapply waterproof sealants if they’ve cracked, peeled, or hardened.
- External Walls: Look for cracks, damp spots, or signs of deterioration in rendering or paint. Early patching helps maintain your home’s protective envelope.
- Ground Grading: Ensure the soil slopes away from your foundation to avoid pooling water around the base of your home.
Improper slope can lead to long-term water issues; here’s an excellent breakdown of how yard and soil grading impacts waterproofing. - Drainage Points: Make sure all drains (including basement floor drains and stormwater pits) are clear and functioning.
By making these part of your home care routine, you’re actively preventing moisture intrusion and identifying small issues before they grow.
Eco-Friendly and Smart Solutions
Technology has made it easier—and more sustainable—to monitor and manage moisture risks around your home. If you’re upgrading or planning preventative work, consider incorporating:
- Drainage board systems: Installed behind retaining walls or foundation slabs, these systems improve water flow and reduce pressure on waterproofing membranes.
- Smart moisture sensors: These can alert you via smartphone when humidity or moisture levels rise in areas like basements, crawlspaces, or under sinks.
- Infrared thermal imaging: Used during inspections, this non-invasive tool detects temperature differences that indicate moisture buildup, even before visible signs appear.
- Eco-conscious materials: Products like low-VOC waterproofing membranes or recycled drainage systems provide durable protection with a smaller environmental footprint.
These smart upgrades not only help detect issues earlier but also align with environmentally responsible building practices—something increasingly important to many Sydney homeowners.
Waterproofing Maintenance Checklist
Use this simple checklist to keep your home’s waterproofing in top shape:
- Clean gutters and downpipes (every 6 months)
- Inspect and reseal window and door frames annually
- Check external walls for cracks, stains, or peeling paint
- Confirm drainage slopes away from the home’s foundation
- Keep basement and subfloor areas ventilated and dry
- Schedule a professional inspection every 2–3 years
- Consider installing smart moisture sensors in at-risk areas
Takeaway: A little maintenance goes a long way. By combining regular visual checks with modern detection tools, you can safeguard your home against future waterproofing issues—and save yourself the stress of surprise repairs.

Why Hiring a Qualified Professional Matters
Waterproofing issues often start small but can quickly spiral into major problems if left unaddressed. Musty odours, bubbling walls, or damp basement corners might not seem urgent—but they’re often signals of deeper, hidden damage. The sooner you act, the more you can protect your home, health, and finances.
While some surface-level maintenance can be handled on your own, diagnosing and fixing the root cause of waterproofing failure requires experience, the right tools, and a strategic approach. A qualified professional doesn’t just repair what’s visible—they assess the full picture. That means detecting plumbing leaks behind walls, evaluating membrane deterioration, and recommending solutions tailored to your specific environment and structure.
Professionals also ensure repairs are done to code, with durable materials and proper techniques that help prevent repeat issues. Whether it’s a foundation crack injection, sump pump installation, or membrane replacement, the goal is long-term performance—not just a temporary fix.
At In House Plumbing, we understand that inviting someone into your home is a matter of trust. That’s why we’re committed to:
- Working cleanly and respectfully in your space
- Communicating clearly with no hidden fees
- Showing up on time and doing the job right the first time
We believe that reliable service should feel simple and stress-free—especially when you’re dealing with a stressful situation.
If you’ve spotted signs of waterproofing failure, don’t wait for them to get worse. Acting early—and working with someone who knows what to look for—can make all the difference in protecting your home for the long haul.
Frequently Asked Questions
There are several warning signs that suggest your waterproofing membrane may no longer be doing its job. These include persistent damp patches, mould or mildew growth, peeling paint, musty odours, and visible water stains on walls or ceilings. In basements, standing water or ongoing leaks are often signs of membrane failure.
If you’re noticing any of these symptoms—especially in older homes—it’s best to have the area professionally inspected.
No, even small signs of moisture shouldn’t be ignored. What looks like a minor issue on the surface can be an early indicator of a larger waterproofing or plumbing problem behind the scenes. Moisture trapped behind walls or under flooring can lead to mould growth, structural damage, and increased repair costs over time. It’s always safer to investigate sooner rather than later.
Some small maintenance tasks—like cleaning gutters, resealing external joints, or using a moisture meter—can be done on your own. However, if the problem persists, recurs, or you’re unsure of the source, it’s time to bring in a professional.
Waterproofing specialists use tools like thermal imaging and pressure testing to accurately diagnose hidden issues and apply long-term solutions that DIY fixes often can’t achieve.
Waterproofing is designed to keep water out entirely—it’s commonly used in areas that experience direct water exposure, like basements, bathrooms, or rooftops. Damp-proofing, on the other hand, is meant to resist moisture rising through walls or floors via capillary action.
While both are important, waterproofing offers a higher level of protection, especially in vulnerable areas.
Costs can vary widely depending on the severity of the problem, the affected area, and the type of repair needed. Minor fixes, like sealing a small leak or patching an external wall, might cost a few hundred dollars. More complex solutions—like membrane replacement or basement tanking—can run into the thousands.
For an accurate quote, it’s best to have a professional assessment—and review a detailed plumbing costs breakdown—based on your specific situation and property.