How to Test for Leaks After Installing Fixtures

Testing bathroom plumbing for leaks after installing new fixtures takes more than just flipping a switch. We need to stay alert and follow simple but effective steps. By drying fittings and watching for hidden signs, we can catch issues early and save ourselves the hassle of future repairs.
Key Takeaways
- Try the “dry-and-check” method: Wipe all joints dry, turn the water on, and check for moisture again after 10–15 minutes.
- Use tissue or paper towel to dab around seals. This makes it easier to detect slow leaks, especially beneath vanities or around toilets.
- Stay alert for warning signs like damp smells, mould, water stains, or higher-than-normal water bills—especially in older Sydney homes, where age can hide leaks.
- Keep a close eye during the first week after installing fixtures, especially after showers or multiple flushes when usage is high.
- Some leaks develop slowly or stay hidden. If anything seems off, we recommend booking a professional check-up to catch those early signs before they create damage.
Start Here: The Quick Bathroom Leak Test Anyone Can Do
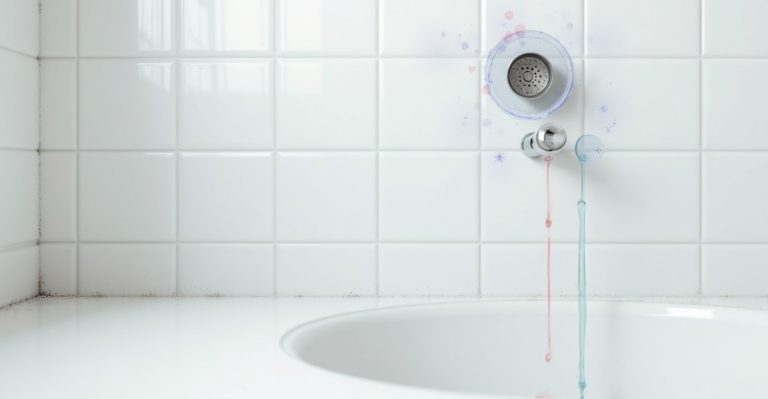
The easiest way to test bathroom plumbing leaks after installing new fixtures is to follow a method we call “dry-and-check.” It’s simple, fast, and can save you from bigger dramas down the track.
Here’s what to do:
- Wipe all joints and pipes dry — this includes around taps, shower fittings, toilet bases, and under-sink connections.
- Turn the water on, whether that’s the main line or just the taps.
- Wait and watch. Give it 10 to 15 minutes to see if any moisture builds up. Pay attention to the base of fixtures and underneath the cabinetry.
Take it a step further with a clean paper towel. Dab gently around joins — it’ll pick up moisture that’s hard to spot with the eye.
If you’re testing a toilet, use the food dye trick. Drop a few drops of food colouring or toilet dye into the cistern. Don’t flush. Wait 15–30 minutes. If coloured water appears in the bowl, you’ve got a leak between cistern and pan.
Small leaks might seem harmless if they’re only a slow drip. But even a slow drip can soak timbers, invite mould, or lead to warped cabinetry over time. These steps apply whether you’re checking a newly-renovated ensuite in your Inner West townhouse or overseeing a commercial fit-out in a CBD office.
Need help after a renovation? Our guide on how to prevent leaks after a bathroom renovation has extra tips.
What to Watch For: Common Signs of Leaks After Installation
It’s not always an obvious puddle of water. Recognising early leak signs helps avoid costly repairs later. Keep an eye (and nose) out for:
- Water pooling under basins or at the base of your toilet
- Musty or damp smells with no clear source
- Mould or mildew popping up suddenly on ceilings or walls
- Paint bubbling or stains on plaster near the bathroom
- Spikes in your water bill – especially in older Sydney homes where pipes can shift or age badly
Leaks don’t always happen straightaway. In fact, tiled bathrooms can trick you — water gets trapped behind walls or under floors before any outward damage shows.
Older homes pose a unique challenge. One Federation-style home in the Inner West had a tap connection on a new vanity that started leaking ever so slightly. The homeowner noticed a faint damp smell in the vanity cupboard three weeks later. Turns out it had soaked into the backing timber — lucky we caught it early.
For more tell-tale signs of bathroom leaks, check out our full bathroom leak checklist.
How Long Should You Monitor After Installing New Fixtures?
Spotting leaks isn’t just a one-time job. Here’s what a solid inspection timeline looks like:
- During install: Always check connection points before turning the water back on.
- In the first 24 hours: After regular use (showering, flushing, hand washing), look for any signs of drips or puddles.
- Over the first week: Trust your senses. Smells, stains or that faint “wet towel” odour mean it’s time to inspect more closely.
In commercial bathrooms — like those in clinics, gyms or cafés — it’s worth adding a leak check to your cleaning routine. Document your inspections. It can help with insurance claims or prove you took action if something goes wrong later.
Hot tip: Water pressure across Sydney isn’t uniform. Areas like Western Sydney often have higher mains pressure, which can strain new fittings faster. Even with a professional install, things can loosen over time due to shifting pipes or ‘water hammer’ — the knock you sometimes hear when you turn a tap off too fast.
Want extra peace of mind? We’ve got more advice on finishing your bathroom reno right with solid fit-off techniques.
Try This Before You Panic: DIY Tips That Make a Big Difference
There’s plenty you can do before picking up the phone. Start with these practical checks and fixes:
Handy DIY leak inspection checklist
Run through this list after installation:
- Tap connections — base, handle and thread joins
- Showerhead arm and wall outlet
- Under-sink pipes and flexi hoses
- Behind or under the toilet
- Floor drains and overflows
Use tissue paper to test those hard-to-see spots. Place it around joins — if it soaks up water or flutters from escaping air, that’s a sign something’s off.
You can also:
- Tighten any loose hand-tight fittings (avoid tools on compression joints unless you know what you’re doing)
- Catch a slow drip with a dry bowl overnight — measure how much collects
- Avoid quick fixes like sealant or tape unless you’re confident. They can mask the leak or damage the fitting over time.
With Sydney’s big weather swings — summer days hitting 40°C then a cool change overnight — pipes can expand or contract more than you’d think. It’s not unusual for something to shift slightly after install.
Need help tracking down leaks without tearing tiles apart? We’ve got a full guide on leak detection that doesn’t wreck your bathroom.
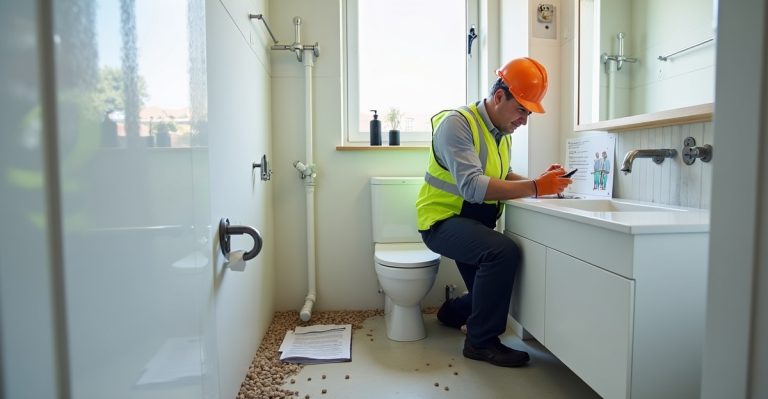
Know When to Call It In: Signs You Need a Sydney Plumber
Sometimes, despite your best efforts, you need a professional. Reach out if you notice:
- A leak that keeps coming back after you’ve tightened things
- Damp walls or ceilings in rooms next to your bathroom
- Toilets that leak or refill randomly without being used
- Weird musty smells with no puddles in sight
- Needing towels or buckets to manage bathroom drips
Not sure what’s going on with your pipes? We’re happy to take a look — call In House Plumbing.
Our experienced team works right across Greater Sydney — from heritage homes in Balmain with ageing plumbing, to modern duplexes out in Parramatta. Whether it’s a sneaky cistern leak or a post-reno shower issue, we can help fast.
Here’s where to learn more about our pipe leak detection services or book general plumbing repairs any day of the week.
Why It Matters: Protecting Your Home (and Wallet) from Water Damage
Ignoring a small leak is never worth the risk. Here’s what can happen when things go unnoticed:
- Timber or cabinetry damage from soaking over time
- Wet conditions that cause tile adhesive to fail
- Mould growth that’s unhealthy and tricky to remove
- Insurance headaches if you can’t show proactive steps
- Bills in the thousands — we’ve seen minor bathroom leaks turn into $5,000+ repair jobs
Even landlords and business owners need to watch out. Tenancy rules and commercial insurance often require you to act fast in case of plumbing issues. Regular leak checks show you’ve done your part.
Don’t take chances with water damage — book a quick inspection today. Catching issues early might cost you nothing but gives peace of mind. And if it turns out to be fine? Great — you can tick that off your list and move on.
Consistent inspections and a few smart steps go a long way. You don’t need to become an expert overnight — just know what to look for, and when to call in help.
Need professional support finding hidden water damage? Our water leak detection service has you covered.