Step-by-Step Bathroom Renovation for Beginners

Renovating a bathroom can feel overwhelming—especially if it’s your first time. That’s why we’ve created this step-by-step bathroom renovation guide specifically for beginners who want to transform their space without the guesswork.
Whether you’re upgrading an outdated layout, planning for resale, or simply craving a more functional and stylish bathroom, this guide will walk you through each phase of the process with clarity and confidence.
In this comprehensive guide, you’ll learn how to:
- Understand the value and timing of a renovation
- Assess your current bathroom and set a realistic budget
- Plan your renovation project effectively
- Hire the right professionals for plumbing, electrical, and tiling
- Manage demolition and prep work cleanly and safely
- Handle installation of fixtures, tiles, and waterproofing
- Add final touches that bring your vision to life
- Avoid common renovation mistakes
- Explore eco-friendly and smart bathroom upgrades
- Key Takeaways
Let’s start by looking at why you might want to renovate your bathroom in the first place.

Why Renovate Your Bathroom? (The Value & Timing of a Remodel)
Renovating your bathroom isn’t just about updating the look—it’s about improving comfort, functionality, and even property value. Whether you’re dealing with an old bathroom that’s showing signs of wear or a layout that simply doesn’t meet your needs, a well-planned bathroom renovation can make a significant difference in your daily life.
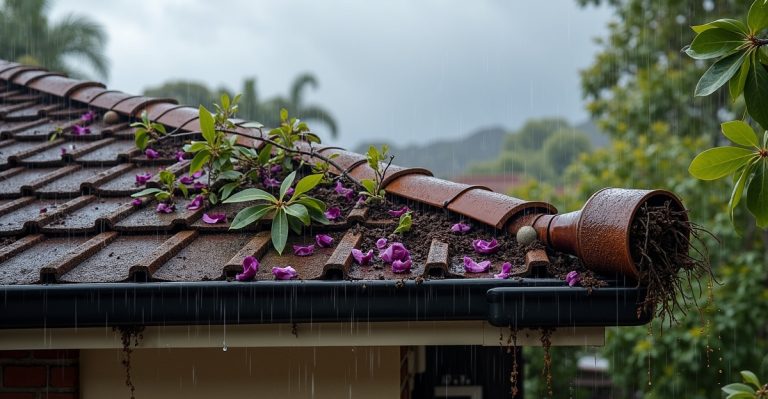
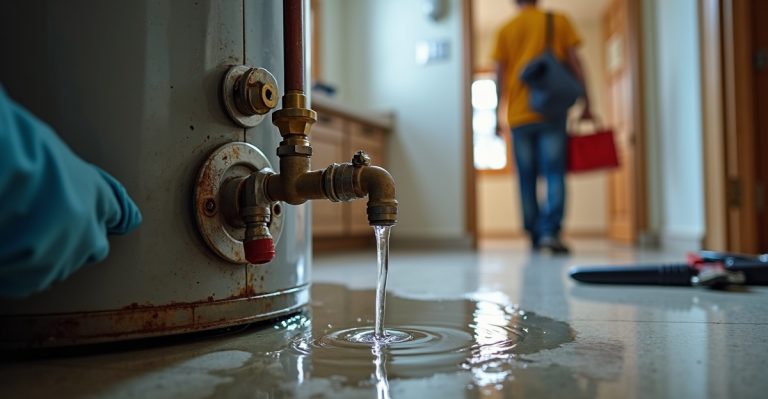
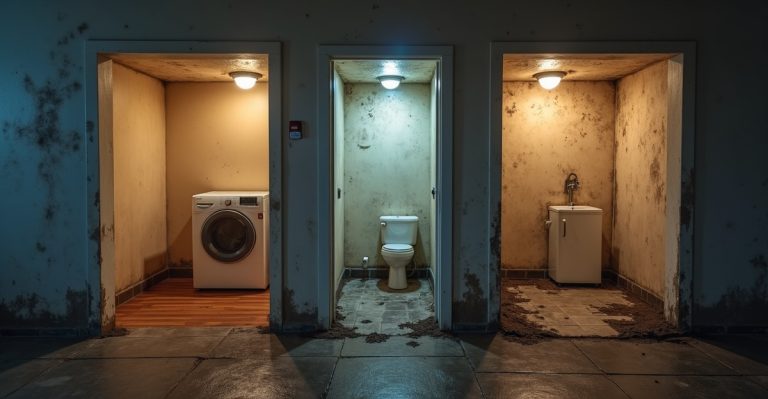
Many Sydney homeowners begin renovations when their current bathroom feels outdated or inefficient. Common signs include cracked tiles, persistent leaks, poor lighting, or a lack of storage. These issues not only affect the space’s usability but can also lead to larger problems like mould or water damage if left unaddressed.
Beyond aesthetics and repairs, there are strategic reasons to renovate your bathroom. If you’re preparing to sell your property, a modern, well-designed bathroom is a proven value-booster. According to local real estate professionals, it’s one of the first rooms potential buyers assess, and it can make or break their first impression.
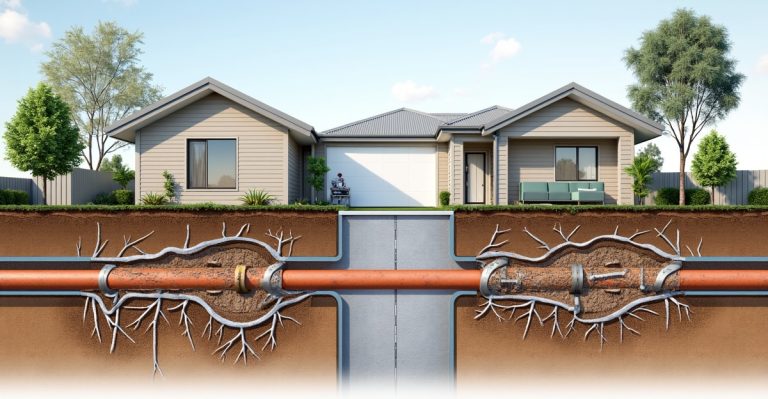
In Sydney specifically, aging infrastructure in many suburbs—especially in homes built 20+ years ago—makes bathroom overhauls more than cosmetic. Plumbing and electrical systems often need updates to meet current safety standards, and newer solutions like water-saving fixtures or smart home integrations offer long-term efficiency gains.
Timing your renovation is also key. If your home is undergoing other improvements or if you’re expecting major life changes (like a growing family or transitioning to remote work), incorporating a step-by-step bathroom renovation into your broader plans can help streamline costs and logistics.
Key takeaway: Renovating your bathroom is a smart move when functionality, efficiency, or aesthetics are falling short. Whether you’re upgrading a tired space or preparing your home for sale, the right renovation can deliver long-lasting value and peace of mind.

Step 1 – Assess Your Current Bathroom Needs and Goals
Before diving into tiles, fixtures, and floor plans, take a step back to evaluate your current bathroom. A thoughtful assessment sets the foundation for a successful renovation by helping you understand what’s working, what isn’t, and what you truly want to achieve. This first step is about aligning your goals with your lifestyle, space limitations, and budget.
What Do You Like or Dislike About Your Current Bathroom?
Start by walking through your bathroom with a critical eye. Ask yourself:
- Is the bathroom layout functional, or do you find yourself bumping into doors or struggling with limited storage?
- Are there fixtures or finishes you still like—or ones you’ve always disliked?
- Does the lighting support your daily routines (like shaving, skincare, or bathing kids)?
This kind of honest reflection will help you preserve what works and plan improvements where needed. For example, you might love your bathtub but hate the cramped vanity, or find the storage layout outdated even if the tiles are still in good condition.
Identify Must-Have vs. Nice-to-Have Features
Next, divide your renovation goals into two categories: must-haves and nice-to-haves. This simple exercise is essential when prioritizing decisions later in the process.
Must-haves might include:
- A walk-in shower to replace a tub you never use
- Upgraded ventilation to prevent mould
- Additional power points for electric toothbrushes or hair dryers
- Improved plumbing lines to fix low water pressure
Nice-to-haves could be:
- Underfloor heating
- A freestanding bath
- Decorative tiles or statement lighting
- Smart mirrors with built-in defoggers
Clarifying these priorities upfront will help keep your renovation on track—even if adjustments are needed along the way.
Set a Realistic Budget and Timeline
Once your goals are clear, it’s time to outline a realistic budget and timeline. Bathroom renovations in Sydney can vary significantly depending on the size of the bathroom space, the complexity of the work, and the quality of materials chosen.
To begin, consider:
- What are you comfortable investing? (Allow 10–20% extra for unexpected costs.)
- Will you stay in the home during the renovation, or do you need temporary arrangements?
- When would you like the project to start and finish?
A good rule of thumb is to break your budget into key categories: plumbing, electrical, fixtures, tiling, and labour. If you’re unsure, a professional consultation can help you shape a plan that fits both your vision and financial comfort zone.
Key takeaway: Understanding your current bathroom, clarifying your must-haves, and setting a clear budget and timeline are vital to shaping the bathroom of your dreams. With this groundwork in place, you’re ready to move forward with confidence into the planning phase.

Step 2 – Plan Your Bathroom Renovation Project
With a clear understanding of your needs, goals, and budget, the next step is to map out your bathroom renovation project from start to finish. Proper planning reduces stress, prevents costly missteps, and ensures that your renovation flows smoothly—especially when coordinating trades, materials, and timelines. Whether you’re managing the project yourself or hiring professionals, this is the stage where your vision starts to take shape.
Creating a Design-to-Finish Plan
A well-structured design-to-finish bathroom renovation plan acts like a roadmap. It outlines every phase of the renovation, from the initial design concept to the final touches. This is where you’ll lock in decisions about layout, style, and materials—and coordinate when and how work will be completed.
Key elements to include in your plan:
- Bathroom layout and flow: Will you move fixtures or retain the current plumbing layout?
- Style and aesthetic choices: Think tiles, fixtures, colour palette, and lighting.
- Product and material selections: Research lead times for vanities, tapware, tiles, and fittings.
- Timeline for each phase: Include time for ordering, delivery, demolition, trades, and inspections.
Tip: Use a checklist or visual timeline to stay organized and monitor progress at each step.
Understanding the Phases of a Bathroom Renovation
Every renovation project follows a basic sequence, and understanding these phases helps set clear expectations:
- Planning and design – Budgeting, selecting materials, engaging professionals
- Demolition – Removing the old bathroom and prepping the site
- Rough-in work – Plumbing and electrical behind-the-wall setups
- Installation – Fitting new fixtures, waterproofing, tiling, and painting
- Finishing touches – Accessories, fittings, final inspection, and cleanup
By following this guide to renovating, you reduce the risk of delays or rework caused by missed steps or poor coordination between trades.
Choosing Between DIY and Professional Help
One of the biggest decisions you’ll make early in the renovation process is whether to manage the project yourself or hire professionals. A DIY bathroom remodel can save on labour costs but often adds complexity, especially when it comes to plumbing, waterproofing, and electrical work—areas where professional certification and compliance with local Sydney codes are essential.
DIY might suit you if:
- You’re updating simple features like painting, accessories, or storage
- You have experience in basic renovations and access to tools
- You’re comfortable managing schedules and sourcing materials
Hiring professionals is often better when:
- You need to move plumbing or electrical fixtures
- You’re waterproofing or installing a shower/bath
- You want the project completed efficiently and to code
In most cases, a hybrid approach works well—leave the critical trade work to licensed pros, and handle the cosmetic upgrades yourself if you’re confident.
Key takeaway: Planning your bathroom renovation with a clear, phased approach helps you avoid surprises and stay in control. Whether you go DIY or bring in the experts, a solid plan is your best tool for turning vision into reality.

Step 3 – Hire the Right Professionals
Even the best renovation plan can fall apart without the right team to bring it to life. Unless you’re tackling a purely cosmetic update, you’ll likely need skilled trades to handle complex plumbing work, electrical work, and tiling—especially when it comes to safety, waterproofing, and compliance with Sydney’s building codes. Hiring experienced, licensed professionals ensures that your renovation is completed properly, on time, and up to standard.
Key Trades You’ll Need
Here are the core trades involved in most bathroom renovations and what each one does:
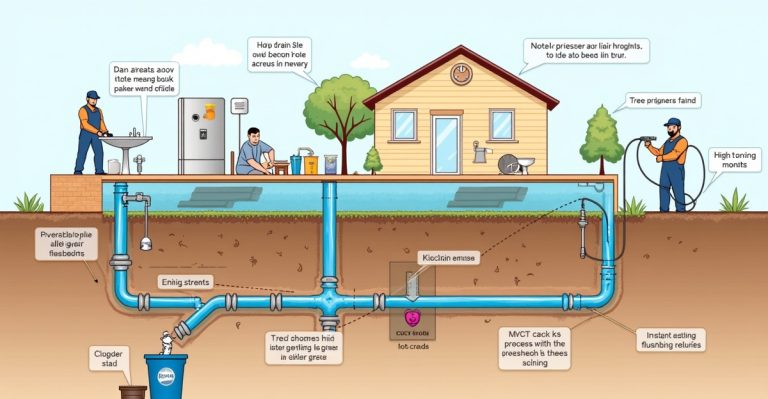
- Plumber: Installs or relocates pipes, taps, toilets, showers, and baths. A qualified plumber also handles tasks like rough-in pipework, fixture installation, and capping services for water lines during demolition.
- Electrician: Manages all electrical work, including installing lighting, power points, exhaust fans, and heated towel rails. They’ll also ensure safe wiring around wet zones and may upgrade your switchboard if needed.
- Tiler: Responsible for waterproofing and laying tiles on floors and walls. A good tiler will also ensure proper slope for your shower floor and apply grout cleanly and evenly.
- Waterproofer (often the tiler or separate specialist): Applies waterproof membranes to protect your structure from moisture damage—an essential step in any renovation.
Some projects may also require a builder (for structural changes), a cabinetmaker (for custom vanities), or a glazier (for shower screens). Your plumber and electrician may also help coordinate plumbing and electrical fixture selections to ensure compatibility.
Questions to Ask Before Hiring
Choosing the right professionals goes beyond a Google search. Ask these key questions to ensure you’re working with someone reliable and experienced:
- Are you licensed and insured in NSW?
- How many bathroom renovations have you completed recently?
- Can you provide references or photos of previous work?
- What’s your timeline availability, and how long will the job take?
- Will you handle the necessary permits and inspections?
- Do you offer fixed pricing or estimates?
Clear communication and transparency from the start set the tone for a smoother renovation process.
Importance of Licensing and Local Compliance in Sydney
In Sydney, all plumbing and electrical work must be completed by licensed professionals to meet safety regulations and building codes. This isn’t just a technicality—it affects the quality, resale value, and insurability of your home.
For example, improper waterproofing or incorrectly installed valves, toilets, and capping services can lead to costly damage and void warranties. Engaging licensed trades also ensures that work is carried out to Australian Standards and signed off where required.
Tip: Always check your contractor’s license through the NSW Fair Trading website and verify their insurance details before signing any agreement.
Key takeaway: Hiring the right trades is one of the most important steps in a bathroom renovation. Qualified professionals not only deliver high-quality results but also protect your home, your investment, and your peace of mind.

Step 4 – Demolition and Prep Work
Once your plans are finalised and your trades are booked, it’s time to clear the way for your new bathroom. Demolition is a critical stage that must be done safely and strategically to avoid damaging plumbing or electrical infrastructure—or worse, compromising the structure of your home. Proper preparation at this stage lays the groundwork for everything that follows.
Removing the Bath, Vanity and Toilet
The first step in demolition is to disconnect and remove all major fixtures from your old bathroom, including the bathtub, vanity, toilet, and any accessories like towel rails or mirrors. This is typically handled by your licensed plumber and electrician to ensure that all water, waste, and electrical wiring are safely isolated before work begins.
It’s important to cap plumbing lines and power points before removing fixtures. This prevents leaks, electrical hazards, and contamination. Some trades may also offer capping services as part of their prep work.
Tip: Take photos of your existing setup before removal—these can help with fixture placement or problem-solving later in the renovation process.
Gutting and Site Cleanup
Once fixtures are removed, the next step is to gut the space. This may involve:
- Removing tiles from walls and floors
- Tearing out old cabinetry or custom storage
- Pulling up damaged or outdated waterproofing layers
- Taking down any wall linings or ceilings that need replacing
Gutting can be messy, so dust control and protection for nearby rooms are essential—especially if you’re renovating while living in the home. A good contractor will use drop sheets, barriers, and efficient waste disposal to ensure a safe and respectful worksite.
After gutting, the room should be cleaned thoroughly to prepare for the next phase. Clean surfaces make it easier for trades to work accurately, and they allow you to spot any structural issues that may need addressing before installation begins.
Rough-in Plumbing and Electrical Work
With a blank slate, your trades can begin the rough-in plumbing and electrical stage. This involves installing the internal pipes, drains, electrical wiring, and fixture points behind walls and beneath floors before surfaces are sealed up.
Key rough-in elements include:
- Water supply and waste lines for toilets, showers, vanities, and bathtubs
- Hot water lines and any new connections
- Power outlets, lighting circuits, exhaust fans, and heated towel rail wiring
- Relocations of plumbing or electrical based on your new layout
Rough-in is a behind-the-scenes but crucial step. Any mistakes here can be costly or difficult to fix once walls are closed and tiles are laid. Ensure that each trade signs off on their work before moving forward.
Key takeaway: A safe, well-planned demolition and prep phase sets the stage for a smooth renovation. It protects your home, keeps the site clean, and ensures that your rough-in plumbing and electrical work is done accurately and to code.

Step 5 – Installation Phase: Plumbing, Electrical, and Fixtures
With the prep work done and your bathroom structure exposed, it’s time for the most transformative stage of your bathroom renovation: installing new fixtures, fittings, and finishing the plumbing and electrical systems. This phase brings your vision to life and requires precision from every trade involved to ensure function, safety, and long-term durability.
Install New Plumbing and Electrical Fixtures
Your plumber and electrician will now install new fixtures based on the rough-in work completed earlier. This includes connecting plumbing lines to taps, toilets, and drains, as well as finalising all electrical fixtures.
Common plumbing installations at this stage include:
- Mixer taps and faucets
- Shower mixers and diverters
- Wall outlets for toilets and vanities
- Hot and cold water supply connections
For electrical work, your contractor will complete:
- Switches and dimmers
- Power points (including GPOs with USB options)
- Exhaust fan and light combo units
- Heat lamps and sensor lighting, if applicable
These are functional elements, but they also impact your everyday experience—so don’t underestimate their role in the overall success of your renovation.
Bathtub, Shower, Vanity, Toilet, and Sink Installations
Next comes the installation of major fixtures. These are the centrepieces of your new bathroom, so choosing the right style and ensuring a proper fit is essential.
- Bathtub: Freestanding or built-in options are available. If space is limited, you may opt to remove the bath entirely in favour of a larger walk-in shower.
- Shower: This may include a tiled base or pre-formed tray, shower head, and glass shower screen. Attention to slope and drainage is key to avoiding pooling or leaks.
- Vanity: Custom or off-the-shelf vanities should be sealed properly and aligned with your plumbing. Consider integrated basins or countertop sinks.
- Toilet: Whether wall-faced or in-wall cistern models, modern toilets are more water-efficient and streamlined.
- Sink and tapware: Your sink and electrical outlets must work well with vanity placement and layout—especially in smaller bathrooms.
This is also when towel rails, toilet roll holders, mirrors, and shelving may be fitted, adding both style and functionality.
Lighting and Power Points Setup
Thoughtful lighting can dramatically improve the atmosphere and practicality of your bathroom. Your electrician will finish wiring and fit-off tasks during this step.
Installations may include:
- Ambient ceiling lights or LED downlights
- Vanity lighting for makeup and grooming tasks
- Strip lighting for under-vanity or mood lighting
- Heated towel rails with timers or switches
- Properly placed power points near vanities or inside shaving cabinets
All components should comply with AS/NZS electrical safety standards, especially in wet areas. Your electrician should also test all installations before final handover.
Key takeaway: The installation phase is where all the planning pays off. From elegant vanities to functional shower heads, every fixture should be installed with care and compliance. A strong finish at this stage ensures your new bathroom performs beautifully—both practically and visually—for years to come.

Step 6 – Tiling, Waterproofing, and Painting
With the major installations in place, it’s time to turn your attention to the surfaces that will define the look and feel of your new bathroom—and protect it for years to come. Tiling, waterproofing, and painting not only bring aesthetic appeal but also play a critical role in maintaining the integrity and functionality of the space, especially in moisture-prone areas like the shower floor and walls.
Choosing and Installing Bathroom Tiles
Tiles are more than a visual element—they’re a durable, water-resistant surface that impacts maintenance, safety, and longevity. When tiling your bathroom, choose products that align with your design vision, slip resistance needs, and ease of cleaning.
Consider:
- Ceramic or porcelain tiles for walls and floors—they’re long-lasting and come in a wide range of styles.
- Matte finishes for better grip in wet areas like the shower.
- Neutral tones or larger format tiles to visually expand a small bathroom.
During installation, precision is key. A professional tiler will ensure proper spacing, alignment, and grout application, giving your bathroom a polished finish. If tiles aren’t laid evenly or slope is ignored, you risk poor drainage or pooling—especially in the shower floor.
Floor Tiles vs. Wall Tiles
While the design and finish of bathroom tiles are important, the distinction between floor tiles and wall tiles comes down to function:
- Floor tiles must be non-slip and rated for foot traffic. They’re usually thicker and more textured to withstand wear and prevent slipping.
- Wall tiles are lighter and can be more decorative. These tiles often cover areas behind vanities, baths, and showers and can be laid up to ceiling height for a clean, modern look.
Matching grout colour and tile finish across floor and walls can create a seamless aesthetic, while contrasting styles can help define zones within the space.
Waterproofing Your Bathroom Correctly
Before a single tile is laid, proper waterproofing is essential—especially in the shower recess, under baths, and on any floor subject to splashing or dampness. Waterproofing is not just a best practice; in NSW, it’s a legal requirement under the Building Code of Australia.
What waterproofing should cover:
- Shower floors and walls up to at least 1.8 metres
- Full floor surface and walls up to 150mm outside the shower
- Around the bathroom tiles, especially where walls meet floors
A licensed waterproofer applies a membrane that prevents water from seeping into structural layers, avoiding long-term damage like rot, mould, or mildew. Once cured, tiling can begin.
Key takeaway: Tiling, waterproofing, and painting are the finishing touches that make your bathroom both beautiful and functional. With the right materials, expert installation, and a compliant waterproofing layer, you’ll ensure your bathroom not only looks great—but lasts.

Step 7 – Final Touches and Styling Your Bathroom
Now that the structural work and major installations are complete, it’s time to personalise your space with final touches that bring warmth, style, and functionality. This stage is where your bathroom makeover comes together visually—transforming a renovation site into a renovated bathroom that feels truly finished. Thoughtful styling and attention to detail can elevate even the simplest design into a space that’s practical, polished, and uniquely yours.
Add Mirrors, Storage, and Accessories
Mirrors do more than reflect—they create the illusion of space and enhance lighting. Consider a sleek frameless mirror for a minimalist look, or go bold with a statement piece that anchors your bathroom remodel.
When it comes to storage:
- Recessed mirrored cabinets save space and provide easy access to daily items.
- Open shelves can display décor while offering practical towel or product storage.
- Wall-mounted vanities help maintain floor space and create a lighter visual footprint.
Finish with accessories that reflect your personal taste but also serve a function:
- Matching towel rails, toilet roll holders, and robe hooks
- Decorative baskets or jars for storage
- Plants, artwork, or candles to soften hard surfaces
This is your opportunity to style your bathroom with personality while keeping the space clutter-free and cohesive.
Install Shower Screens and Fixtures
Your shower screen not only separates wet and dry zones—it defines the visual flow of your bathroom. Frameless glass screens offer a clean, modern look and help small spaces feel open. For busy households, consider semi-frameless or framed options for added durability.
Now’s also the time to fit the final fixtures, such as:
- Toilet paper holders and towel rings
- Tapware and spouts
- Cabinet handles and drawer pulls
- Heated towel rails
Ensure all installations are level, aligned, and securely fixed. This is often done by your plumber or builder to ensure everything functions as intended.
Conduct a Final Inspection and Clean-Up
Before calling your project complete, conduct a thorough walkthrough with your trades or builder. Check that all fixtures operate correctly, finishes are clean, and no elements are missing or damaged. Test:
- Tap and shower pressure
- Drainage in sinks and the shower
- Lighting and power points
- Ventilation and heating elements
Once everything is signed off, it’s time for a deep clean. A reputable contractor will leave your space spotless, but if you’ve been managing trades yourself, consider a professional cleaning service to remove dust, grout haze, and construction debris.
Key takeaway: The final touches are where your bathroom goes from functional to fabulous. With the right styling, attention to detail, and a thorough inspection, your bathroom makeover will not only look complete—it will feel like home.

Cost Breakdown of a Bathroom Renovation in Sydney
Understanding the cost breakdown of a bathroom renovation is crucial to staying within budget and making informed choices. Whether you’re aiming for a modest refresh or a complete bathroom overhaul, the total cost will vary based on the size of your space, quality of materials, and the complexity of the work involved.
In Sydney, where labour and material costs can be higher than the national average, careful planning can help you achieve a modern bathroom refurbishment that aligns with your vision and financial comfort zone.
Basic vs. Luxury Renovation Costs
Here’s a general guide to what you can expect for different types of bathroom renovations in Sydney:
- Basic Renovation:
Estimated range: $15,000 – $25,000
Includes replacing standard fixtures, tiling, and paint without moving plumbing or electrical. Ideal for small spaces or investment properties. - Mid-Range Renovation:
Estimated range: $25,000 – $35,000
Covers more custom finishes, new vanities, updated lighting, and moderate layout changes. Suitable for homeowners looking for a fresh, functional design. - Luxury Renovation:
Estimated range: $35,000 – $50,000+
Involves high-end materials, designer fittings, custom joinery, smart tech integration, and possible structural changes for a high-impact result.
These estimates reflect overall cost ranges but can vary based on product choices, access constraints, and unforeseen issues discovered during demolition.
Where to Save and Where to Spend
Not every part of your bathroom needs a premium price tag. Here’s a quick guide to where spending more makes sense—and where you can save without sacrificing quality:
Spend more on:
- Waterproofing and tiling: These are foundational for longevity. A small error here can lead to major issues down the line.
- Tapware and shower fittings: Durable, well-made fixtures last longer and often come with better warranties.
- Vanity and storage: Custom or high-quality cabinetry can significantly enhance functionality and aesthetics.
Save on:
- Tiles and finishes: Look for quality mid-range options or mix expensive feature tiles with more affordable basics.
- Lighting and accessories: Stylish but cost-effective options are widely available and easy to upgrade later.
- Cosmetic upgrades: Repainting walls or changing mirrors and towel rails are simple, low-cost ways to refresh the look.
What Impacts Your Overall Cost?
Several factors influence the overall cost of your renovation:
- Bathroom size: Larger spaces require more materials and labour.
- Scope of work: Moving plumbing or electrical will always add cost.
- Accessibility: Apartments or tight access sites may require extra time and effort.
- Material choices: Premium brands, custom finishes, and imported tiles increase the total spend.
- Trade quality and scheduling: Engaging experienced, licensed trades may cost more upfront but helps avoid rework and future repairs.
- Hidden surprises: Water damage, mould, or non-compliant existing work can increase costs during demolition or rough-in phases.
Key takeaway: A well-planned bathroom renovation in Sydney typically starts around $15,000, but the cost breakdown depends heavily on design goals, trade scope, and material choices. Spend wisely on the essentials, and balance form and function to get the best return on your investment.

Common Mistakes to Avoid in Bathroom Renovations
Even the most well-intentioned bathroom renovation can go off track if key steps are missed or rushed. Avoiding common pitfalls is just as important as following a good renovation checklist for bathrooms. From inadequate planning to poor material choices, here are the top mistakes to watch out for—and how to prevent them—so your project stays on time, on budget, and results in a successful renovation.
Skipping the Planning Phase
Jumping into a renovation without a clear plan is one of the most common and costly mistakes. Skipping this step often leads to last-minute decisions, design regrets, and budget blowouts.
Avoid it by:
- Creating a clear layout and design vision before any work begins
- Finalising fixture and material selections early to avoid delivery delays
- Mapping out a realistic timeline, including buffer time for unexpected issues
A detailed plan gives you and your trades a roadmap to follow, ensuring everyone is aligned from day one.
Hiring Unqualified Trades
Your bathroom is one of the most technically demanding rooms in the home. Using unlicensed or inexperienced trades might save money upfront, but it often leads to subpar work, delays, and costly re-dos—not to mention legal issues if work isn’t up to code.
Avoid it by:
- Checking licenses and insurance for all plumbers, electricians, and tilers
- Asking for references or photos of recent work
- Choosing trades who are familiar with local Sydney regulations and standards
For a truly successful renovation, invest in skilled professionals who stand by their work.
Choosing the Wrong Materials
Not all bathroom materials are created equal. Choosing products that don’t suit wet environments or heavy use can lead to premature wear, safety concerns, and even water damage.
Avoid it by:
- Selecting water-resistant finishes and durable surfaces like porcelain tiles
- Ensuring all fixtures are rated for bathroom use (especially lighting and power points)
- Prioritising quality over looks alone—stylish doesn’t always mean long-lasting
Tip: A helpful supplier or experienced tradesperson can recommend the right products for your layout, lifestyle, and budget.
Key takeaway: A renovation checklist for bathrooms should include more than just tasks—it should help you steer clear of common missteps. By planning thoroughly, hiring qualified trades, and choosing the right materials, you’ll set yourself up for a smooth project and a bathroom that stands the test of time.

Eco-Friendly and Smart Upgrades for Modern Bathrooms
Modern bathroom renovations aren’t just about aesthetics—they’re about building a more functional bathroom that supports sustainability, energy efficiency, and everyday convenience. With growing interest in eco-friendly living and smart home features, incorporating these upgrades can add long-term value to your renovation while reducing your environmental impact.
Whether you’re planning a full home improvement or simply updating a few features, these additions are worth considering.
Water-Saving Fixtures and Energy Efficiency
Bathrooms are one of the highest water-using areas in the home. Installing water-saving fixtures can significantly reduce consumption without compromising performance.
Consider:
- Dual-flush toilets that let you control water usage per flush
- Low-flow shower heads that maintain pressure while conserving water
- Tapware with aerators to limit water flow in vanities and basins
- Energy-efficient exhaust fans and LED lighting
Not only do these upgrades benefit the environment, but they also lower your utility bills—making them a smart long-term investment.
Smart Plumbing and Digital Controls
Integrating smart home technology into your bathroom can boost both comfort and efficiency. These intelligent solutions are becoming more accessible and user-friendly, offering high-end functionality at a range of price points.
Popular smart upgrades include:
- Touchless faucets for hygiene and convenience
- Digital shower controls that let you set water temperature and flow with precision
- Smart mirrors with built-in LED lighting, anti-fog features, and Bluetooth connectivity
- Leak detectors and water monitors that alert you to problems before they cause damage
These systems not only enhance the user experience but also help monitor usage and reduce waste, aligning with eco-conscious living.
Eco-Friendly Materials and Practices
Beyond fixtures and tech, consider the environmental impact of the materials used in your renovation. Sustainable choices can reduce your carbon footprint while still delivering style and durability.
Examples include:
- Recycled or sustainably sourced tiles and benchtops
- Low-VOC paints and sealants to improve indoor air quality
- Bamboo cabinetry or FSC-certified timber for vanities and shelving
- Locally sourced materials to reduce transportation emissions
You can also reduce landfill waste by donating your old vanity, fixtures, or tiles to reuse centres or recycling programs where possible.
Key takeaway: Adding eco-friendly and smart home features to your bathroom renovation isn’t just trendy—it’s a practical way to future-proof your space. These thoughtful upgrades help you build a more sustainable, efficient, and functional bathroom while contributing to a healthier home and planet.
Key Takeaways
Now that you’ve explored every phase of the process, you’re equipped with a clear, practical understanding of the essential steps of a bathroom renovation. From planning and demolition to installation and styling, each stage plays a critical role in delivering a result that’s functional, beautiful, and built to last.
Need expert advice before you get started? Whether you’re refreshing a powder room or tackling a full bathroom transformation, our experienced team at In House Plumbing is here to help. From plumbing rough-ins to final fixture installations, we ensure every detail is handled with care, cleanliness, and compliance. Book a consultation today to discuss your goals, ask questions, and get a tailored quote from trusted Sydney professionals.
Frequently Asked Questions
A full bathroom renovation typically follows these steps:
Assess your current bathroom and set goals
Plan your layout, design, and budget
Hire licensed professionals (e.g., plumber, tiler, electrician)
Demolish the old bathroom and prepare the space
Complete rough-in plumbing and electrical
Install fixtures like the shower, vanity, and toilet
Waterproof and tile the surfaces
Paint and add finishing touches
Conduct a final inspection and cleanup
Following a structured step-by-step guide will help you stay on track and avoid costly mistakes.
Bathroom renovation costs in Sydney typically range from:
$15,000 – $25,000 for a basic update
$25,000 – $35,000 for a mid-range renovation
$35,000+ for a high-end or luxury upgrade
The cost breakdown of a bathroom renovation depends on bathroom size, material quality, scope of work, and the trades you hire. Always factor in an additional 10–20% for unexpected costs.
While cosmetic changes like painting or installing accessories can be DIY-friendly, most bathroom renovations require licensed trades for plumbing and electrical work, waterproofing, and tiling. Hiring professionals ensures the job is done safely, complies with Sydney regulations, and avoids long-term issues. If you’re considering a DIY bathroom remodel, limit it to tasks that don’t involve structural or compliance-related work.
A standard bathroom remodel in Sydney usually takes between 3 to 5 weeks, depending on the complexity of the project. Here’s a rough breakdown:
Planning and approvals: 1–2 weeks
Demolition and prep: 3–5 days
Rough-in work: 3–4 days
Installation and tiling: 1–2 weeks
Final touches and inspection: 2–4 days
Delays may occur due to material availability, trade scheduling, or unforeseen issues, so allow for some flexibility in your timeline.
For a full renovation, you’ll likely need the following licensed professionals:
Plumber – to handle drainage, water lines, and fixture connections
Electrician – to install lighting, switches, and power points
Tiler – for waterproofing and laying bathroom tiles
Waterproofer – often handled by the tiler or a separate specialist
Cabinetmaker or glazier – for custom vanities or shower screens (if applicable)
Each trade plays a key role in delivering a safe, compliant, and visually appealing result.