How We Fix Shower Leaks Caused by Silicone Fails

If you’ve noticed damp spots near your shower, persistent mould, or a musty smell that won’t go away, there’s a good chance you’re dealing with a shower leak—and failing silicone seals are often to blame. These small issues can lead to serious water damage if left unchecked.
In this guide, we’ll walk you through the most common causes of shower leaks, how to spot the early warning signs, why silicone fails in wet areas, and how to fix a leaking shower using our team at In House Plumbing—cleanly and professionally, without tearing your bathroom apart.
Here’s what we’ll cover:
- What Causes a Shower Leak?
- Signs You Have a Shower Leak
- Why Silicone Fails in Wet Areas
- Our Step-by-Step Process to Fix It Right
- How to Prevent Future Shower Leaks
- When You Should Call a Professional
- Conclusion: Leak Fixed, Worries Gone
First, let’s take a look at what might be causing your shower to leak in the first place.

What Causes a Shower Leak?
A shower leak might start small—just a damp corner of the bathroom or a bit of bubbling paint—but left unchecked, you risk needing full-scale waterproofing shower leak Sydney style to prevent serious water damage behind the scenes. Understanding what’s actually causing the leak is the first step toward fixing it properly and preventing future headaches.
Let’s break down the three most common culprits we see in Sydney homes and properties.
Failing Silicone Seals
Silicone is meant to keep water where it belongs—inside the shower. But over time, even good-quality silicone can break down. Age, daily exposure to steam and cleaning products, and the natural shifting of your home can all cause the sealant to lose its grip.
In some cases, it wasn’t applied properly in the first place. We often see silicone failure around corners, joins, and along the bottom of shower screens. When it lifts, cracks, or peels away, water seeps into the tiny gaps and begins to pool behind tiles or walls.
This is one of the most common sources of shower waterproofing problems. If caught early, a targeted leaking shower base repair or silicone reseal can stop the leak without needing a full renovation.. The key is knowing what to look for and acting before the damage spreads.
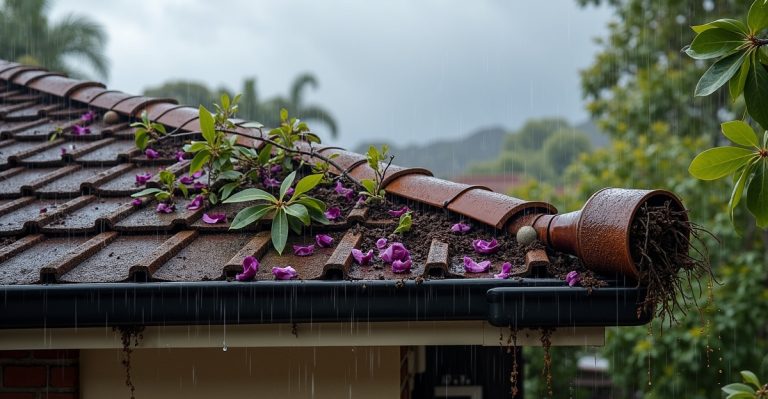
Cracked Tiles and Grout Issues
Even if your silicone looks fine, worn or damaged grout between your tiles can let moisture through. Over time, grout becomes porous—especially if it wasn’t sealed correctly after installation. Add in natural tile movement from temperature changes or daily use, and it’s easy to see how water finds its way into places it shouldn’t.
We’ve seen this in everything from modern apartments to older Federation homes around Sydney. Once water gets behind cracked tiles or through degraded grout, it can lead to waterproofing failure—which means bigger problems down the line, like mould buildup or rot in the walls.
Regular checks and maintenance can catch grout issues before they escalate. If grout is flaking, cracked, or discoloured, it’s time to take a closer look.

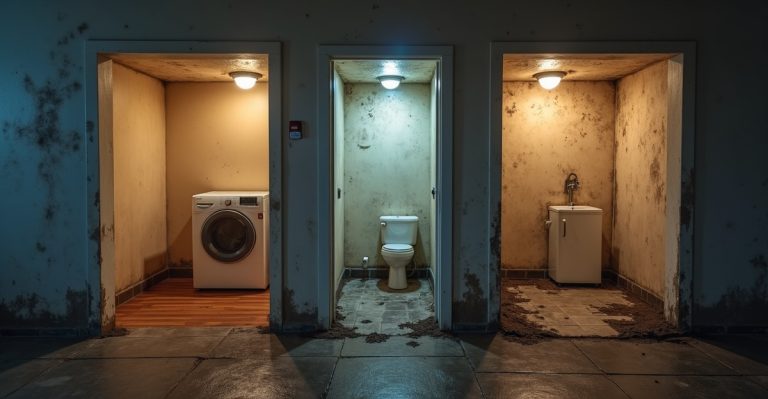
Signs You Have a Shower Leak
Not every shower leak announces itself with a puddle on the floor. In many cases, the damage is slow, silent, and hidden—only becoming obvious when it’s already caused significant trouble behind the scenes. The good news? There are warning signs to look for if you know where to check.
Spotting the early signs of a shower leak gives you a better chance of avoiding costly repairs and protects the long-term health of your bathroom.
Visible Signs
Some signs of a leaking shower wall you should watch for include:
- Mould buildup around the shower base, walls, or corners of the bathroom—especially if it keeps returning after cleaning
- Flaking or bubbling paint on nearby walls or ceiling surfaces
- Swollen or warped skirting boards (timber trims) at the base of your walls
- Damp floor tiles or puddles forming outside the shower after use
These are often signs of a leaking shower where water has found its way behind tiles or walls, compromising surfaces and structures. The longer it goes unchecked, the more extensive the water damage can become.
If you’re seeing repeated mould growth, it’s not just a cosmetic issue—it may point to prolonged moisture exposure. For more on potential health concerns, check out this article on the long-term side effects of mould exposure.
Subtle Red Flags
Not all warning signs are visual. Sometimes, a leak speaks through changes in smell, moisture, or even your utility bills:
- A musty or damp odour near the bathroom that doesn’t go away
- A noticeable spike in your water bill despite no change in usage
- Fine cracks in grout or tiles, particularly near corners or joins
- Feeling that the bathroom floor is “spongy” or slightly raised underfoot
These may seem minor at first, but they can point to a hidden leak that’s working its way through structural materials or insulation. These types of leaks are especially common in older Sydney homes or bathrooms with aging waterproofing.
Want to double-check if you have a leak? Here’s a practical guide to detect a leak at home using simple techniques.
When to Take Action
If you’ve spotted one or more of these signs, it’s time to act. Shower leaks don’t fix themselves—and what seems small today can lead to expensive repairs tomorrow, especially if left to spread behind walls, under floors, or through ceilings below.
Early intervention gives you more repair options, reduces the risk of long-term damage, and keeps costs down. Whether it’s mould buildup, cracked tiles, or that musty smell you just can’t shake—it’s worth getting it checked by a professional before it escalates.
Takeaway: The earlier you identify a shower leak, the easier it is to fix. Whether it’s obvious damage or subtle changes, paying attention to these warning signs can help protect your home—and your wallet—in the long run.
Next, let’s look at one of the most common causes behind these issues: failed silicone seals.

Why Silicone Fails in Wet Areas
When it comes to a shower leak, one of the most common—and most overlooked—culprits is silicone. It’s meant to act as a waterproof barrier, sealing joints where tiles meet the shower base, walls, or glass panels. But over time, even the best silicone can fail. And when it does, water finds a way in.
So why does this happen so often, especially in high-use, high-moisture spaces like showers?
1. Improper Installation or Surface Prep
Silicone needs a clean, dry, and dust-free surface to stick properly. If the surface wasn’t prepped well during installation—or if old residue or moisture was left behind—the silicone may never have bonded securely in the first place.
We often find silicone failure in corners or joins where water is constantly hitting, especially in DIY jobs or quick-turnaround renovations. Even the smallest lifting edge or unsealed gap can lead to slow leaks and long-term damage.
2. Low-Quality or Expired Products
Not all silicone is created equal. Lower-grade or expired products may look fine when first applied, but they tend to shrink, crack, or peel prematurely. We’ve seen jobs around Sydney where cheap silicone gave out in less than a year—leaving homeowners with a leaking shower and costly water damage behind the walls.
Using high-grade, mould-resistant, bathroom-safe waterproofing materials is key. It lasts longer, stays flexible, and holds up better in hot, wet conditions.
3. Sydney’s Humidity and Building Movement
Local climate plays a role too. Sydney’s seasonal humidity, combined with natural movement in building materials, puts daily stress on sealant lines. Over time, expansion and contraction can cause silicone to separate from surfaces, especially in bathrooms with poor ventilation or older construction.
In apartment buildings or homes with suspended flooring, even small shifts can affect the integrity of your shower waterproofing. These are subtle changes that aren’t always visible—but they compromise your waterproof barrier just the same.
Silicone vs Epoxy Grout: What’s the Better Option?
Silicone is flexible, which makes it ideal for expansion joints—but it’s not always the most durable long-term solution. In some cases, epoxy grout is a better alternative. It’s more resistant to water and stains, doesn’t crack as easily, and holds up better in high-moisture areas. Learn more about how epoxy compares to cement grout and when it’s the better choice.
That said, it’s not a one-size-fits-all fix. A professional can assess whether epoxy, silicone, or a combination of both offers the best sealant for your shower, based on your space, usage, and the condition of your existing materials.
Takeaway: Silicone is essential in keeping showers watertight—but when it fails, leaks are sure to follow. Whether it’s due to poor prep, inferior products, or building stress, knowing why sealants break down helps you make smarter choices when it’s time for repairs. In the next section, we’ll show you exactly how we fix silicone-related leaks—without ripping up your bathroom.

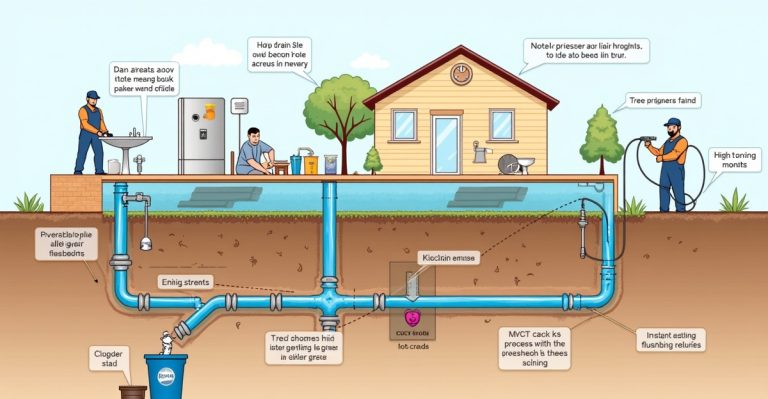
Our Step-by-Step Process to Fix It Right
When it comes to repairing a shower leak, a quick patch job just won’t cut it. At In House Plumbing, we take a thorough, no-shortcuts approach to diagnosing and fixing the issue—starting with the real cause, not just the symptoms. Whether it’s a silicone failure, cracked tiles, or a deeper structural problem, our process is designed to be clean, non-invasive, and built to last.
Here’s exactly how we handle it.
Detecting the Source
Before we touch a tube of sealant, we start with proper shower leak detection. It’s not enough to guess—we use the right tools to pinpoint the hidden leak with precision.
- Moisture meters help us identify areas where water has penetrated behind tiles or into walls
- Visual inspection reveals failing silicone, hairline tile cracks, or grout deterioration
- Where needed, we’ll perform a full plumbing inspection to rule out deeper issues like leaking pipes or faulty shower bases
By confirming the exact source, we make sure the repair targets the problem directly—no guesswork, no band-aid fixes.
Clean Silicone Removal and Resealing
Once we know what we’re dealing with, we carefully remove the old, damaged silicone. This is done without removing tiles—so your bathroom stays intact and disruption is minimal.
Then we apply high-grade, mould-resistant silicone with precision, ensuring:
- Smooth, consistent sealing
- Strong adhesion to all surfaces (glass, tile, acrylic, etc.)
- Protection against future leaks and waterproofing failure
Our team takes care to leave the work area spotless—no mess, no stress. And because we specialise in fast shower repairs across Sydney, we get the job done efficiently, without cutting corners.
Post-Repair Protection
Once the reseal is complete, we apply protective waterproof membranes or upgraded sealants if needed. This adds an extra layer of durability, especially in older showers or areas with heavy daily use.
We also use eco-friendly products wherever possible—minimising fumes, improving indoor air quality, and reducing environmental impact.
Takeaway: Our goal isn’t just to fix the leak—it’s to fix it right. With precise diagnostics, clean resealing methods, and long-term protection, we make sure your shower stays watertight, worry-free, and ready for daily use. Up next, let’s explore how to keep it that way.

How to Prevent Future Shower Leaks
Fixing a shower leak is one thing—keeping it from coming back is another. The good news? With a few simple maintenance habits, you can extend the life of your shower, protect your bathroom from water damage, and avoid the stress of unexpected repairs down the line.
Here’s how to stay ahead of leaks before they start.
1. Reseal Every Few Years (Don’t Wait for Cracks)
Even high-quality silicone has a shelf life. On average, we recommend resealing your shower every 3 to 5 years, depending on usage and wear. If you notice early signs like peeling edges, mould buildup, or water pooling where it shouldn’t—don’t ignore it.
Proactive shower resealing helps maintain the waterproof barrier and prevents minor issues from turning into hidden leaks. It’s a quick, low-disruption job that saves time and money in the long run.
2. Maintain Grout and Tiles
Your grout lines do more than just hold tiles together—they also keep moisture out. But over time, grout can wear down, crack, or become porous, especially in older bathrooms or high-use showers.
To protect your shower waterproofing:
- Regularly check for grout issues, like cracks, gaps, or discolouration
- Use a pH-neutral cleaner to avoid weakening the grout
- Consider reapplying grout sealant annually for added protection
Small upkeep now prevents big bathroom leak repairs later.
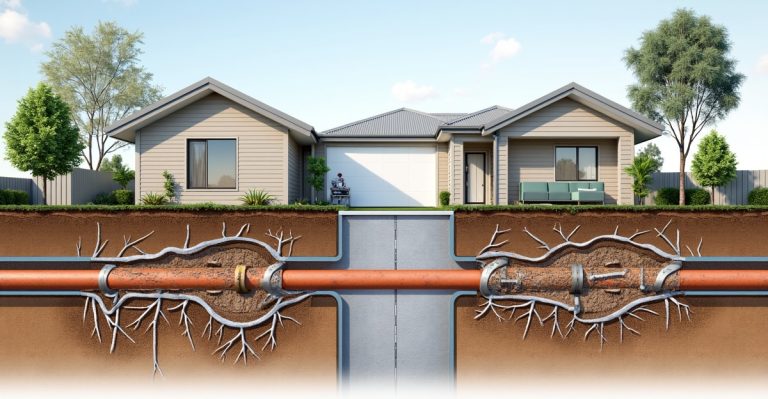
3. Schedule Regular Plumbing Inspections
Not all problems are visible on the surface. A plumbing inspection every couple of years—especially if your home is over 10 years old—can catch early signs of leaks, pipe repair, or drainage problems before they escalate.
Think of it like a health check-up for your bathroom. It gives you peace of mind and helps you plan for upgrades or repairs before something breaks unexpectedly.
4. Improve Ventilation to Prevent Mould
Mould buildup thrives in damp, poorly ventilated spaces—making your bathroom a prime target. Left unchecked, mould not only causes unpleasant smells but also deteriorates grout and sealants faster.
To reduce humidity and keep moisture under control:
- Use an exhaust fan during and after showers
- Leave the door or window open to let air circulate
- Wipe down shower walls regularly to reduce condensation
Good airflow = longer-lasting seals and a healthier bathroom environment.
Takeaway: Preventing shower leaks comes down to smart maintenance. Regular resealing, grout care, and proper ventilation all work together to keep your bathroom leak-free and in top shape. In the next section, we’ll talk about when it’s time to call in a professional for backup.

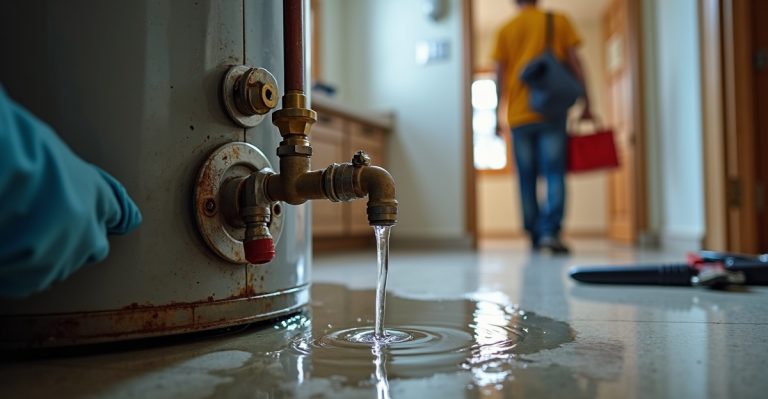
When You Should Call a Professional
Some shower leaks are easy to spot—but not always easy to fix. While a bit of silicone from the hardware store might seem like a quick solution, DIY fixes can sometimes mask the problem rather than solve it. And ignoring a slow leak? That can lead to serious water damage, mould, and expensive repairs down the line.
So when is it time to bring in the pros?
1. You’re Dealing with a Hidden Leak
If you’ve noticed signs like mould buildup, a musty smell, or moisture in places that don’t make sense, there’s likely a hidden leak at play. These issues often require specialised slab leak detection tools and a trained eye to pinpoint the source accurately.
2. You’ve Tried DIY… and It Didn’t Hold
Applied silicone yourself but the leak came back? You’re not alone. We often get called after a DIY job didn’t last, not because it was done with bad intent, but because proper surface prep, product selection, and technique matter more than most realise.
Professionals use high-grade sealants, ensure complete removal of old material, and understand how movement, humidity, and tile structure affect the repair.
3. The Leak’s Getting Worse (or You’re Not Sure Where It’s Coming From)
If the leak is spreading, causing water damage, or affecting areas outside the shower, it’s best to act fast. What starts as a minor drip can turn into warped flooring, stained ceilings, or rot behind the walls.
Even if you’re not sure it’s a leak, a quick plumbing inspection can confirm what’s going on—saving you the hassle of guesswork or costly surprises later.
Call In House Plumbing (When You’re Ready)
No pressure, no hard sell—just honest, local advice. If you’re unsure what’s causing that damp spot or why mould keeps coming back, we’re here to help. Talk to an expert today.
Need help identifying a leak? We’re happy to take a look—no mess, no stress.
Takeaway: When in doubt, it’s worth having a professional check things over. The sooner you catch the issue, the simpler—and more affordable—the fix usually is. Let’s wrap things up with a quick recap of what we’ve covered.

Conclusion: Leak Fixed, Worries Gone
A shower leak might seem like a minor nuisance at first, but as we’ve seen, it can quickly lead to mould, structural damage, and costly repairs—especially when it’s caused by a failing silicone seal. From cracked grout and poor ventilation to damaged shower bases, there are many ways water can sneak past your bathroom’s defences.
The good news? You don’t have to figure it out alone. With over 20 years of experience across Sydney homes and businesses, In House Plumbing knows exactly how to handle leaking shower repairs Sydney, diagnose the issue, repair and prevent shower leaks—cleanly, professionally, and with minimal disruption to your space.
We believe in long-term solutions, not patch jobs. That’s why we take the time to get it right the first time—whether that means precision leak detection, expert shower resealing, or helping you stay ahead of problems with regular inspections and helpful advice.
Still unsure what’s causing that damp spot? Let us help you find and fix it—fast.
No mess. No stress. Just reliable plumbing you can count on.
Frequently Asked Questions
The most common sign is water escaping from the corners or edges of the shower, even when the rest of the tiles and grout look intact. You might notice:
Mould buildup around silicone joints
Peeling, cracked, or lifted silicone
Damp spots or water damage near the shower base
A leaking shower that seems worse after use, but no obvious tile damage
If you suspect the shower seal is failing, it’s best to have it inspected before moisture gets behind the walls or floor.
Yes—many leaks, especially those caused by silicone failure or degraded grout, can be fixed without removing tiles. At In House Plumbing, we use targeted resealing techniques that restore waterproofing with minimal disruption. This means:
No demolition
Fast turnaround
Clean, precise results
It’s a smart option for many Sydney homes with mild to moderate shower leaks.
For most showers, high-quality, mould-resistant silicone is the go-to option. It’s flexible, durable, and effective when applied correctly. In some cases—especially for areas with heavy wear—epoxy grout may be used alongside silicone for even more strength and water resistance.
Choosing the best sealant for showers depends on your bathroom’s materials, how it’s used, and the condition of existing surfaces. A professional can help you decide what’s best for long-term results.
Absolutely. Mould buildup—especially if it keeps returning—is often a clue that water is escaping into places it shouldn’t. It could point to:
A failing silicone seal
Cracked grout or tiles
Hidden moisture behind walls
Beyond the inconvenience, mould can also impact indoor air quality and home health. Addressing the leak at its source is key to getting rid of mould for good.
The cost to repair leaking shower varies depending on the size of the shower, the extent of the leak, and the materials involved. However, we offer transparent quotes for shower repairs so you know exactly what to expect—no hidden fees, no surprises.
In many cases, resealing is far more affordable (and less disruptive) than a full renovation, especially if caught early. Want to know what it might cost for your shower? We’re happy to take a look and provide a clear, honest estimate.